|
Molding Boat Parts |

|
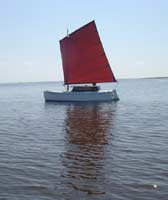
Glenn Maxwell’s Paradox cruiser, Zoë, is a masterpiece. We got a chance to make a detailed examination last May at Cedar Key by virtue of having Chuck Leinweber along with us in our Frolic2, Oaracle, and Glenn had promised Chuck he could take a spin in Zoë. So we got a chance to check out the Matt Layden-designed cruiser from stem to stern and Glenn’s immaculate construction. Then Chuck got his ride, while Glenn helmed us in Oaracle with nonchalant competence.
Zoë at Cedar Key: a masterpiece
(click images for larger views) |
|
|
One detail that stuck in my mind was the unique anchor line chock that runs straight out over the bow of Zoë. (Wish I had a picture, but I didn’t have a camera with me.) I asked Glenn how he did it. He explained, to the best of my recollection, that he recessed a section of PVC pipe into the bow deck (the pipe was around 2 inches in diameter, I’d guess). Then he drew in the chock pattern, cut it out, and smooth it up. Finally, he applied seven lawyers of glass cloth set in epoxy, including to the overlapping “fingers” of the chock, and then rounded and smoothed everything again. I was amazed, there wasn’t a pit, crack, bump or sharp spot anywhere in the finish, and the fingers felt as hard as steel. Flawless, like the rest of Zoë.
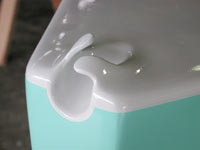 |
the unique anchor line chock on the bow of Glen Maxwell's Paradox "Zoë"
|
|
Enough digression. I took no immediate lessons from the inspection of Zoë, but it did reinforce in the back of my find that intricate parts could be made by molding fiberglass. The idea resurfaced recently when I was adding a small mizzen to Oaracle both for balance, and control when reefing the balanced lug main. Since the mizzen mast would be stepped at the transom, a boomkin would be necessary, with a block at the end, for the sheet. Part of the boomkin would be supported simply by tying it to the mizzen mast mount, but there still needed to be a way to support the boomkin heel. I had some rough thoughts of wooden chocks and lashings, but they seemed clunky and perhaps time consuming to set up. Then the Zoë example popped into mind. Why not mold a fitting into which the heel of the boomkin could simply slide into?
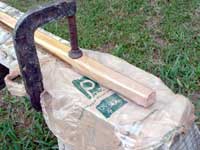
It turned out to be incredible easy. The heel of the boomkin was covered with plastic, held in place by clear packing tape, neither of which sticks to epoxy, especially the tape. Then one end of a sawhorse was covered with plastic, also taped in place. The boomkin was clamped to the sawhorse so the plastic covered heel was over the plastic on the horse.
| Wrapped boomkin: The boomkin and end of a sawhorse are wrapped with plastic which is taped in place, and then the boomkin is clamped to the sawhorse. By the way, I used plastic grocery bags, which had a tendency to stick to the epoxy, so use a different plastic. The epoxy did not stick at all to the clear packing tape used to secure the plastic. |
|
|
Then it was just a matter of cutting and laminating on strips of fiberglass. Since the fitting has some hard bends, I mostly used matt which takes sharp turns better. A couple layers of cloth were used, because its directional fibers add strength and using cloth as the final layer makes a smoother job. The layup was five layers of matt and two of cloth wrapped over the end, and three layers of matt wrapped around the heel of the boomkin.
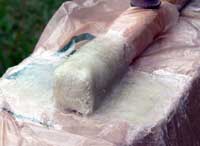 |
Part layup: Glass matt and cloth are laminated in epoxy over the protected end of the boomkin. Make the last layer cloth for a smoother finish.
|
|
Obviously, more layers could be added to make a superstrong fitting, but the mizzen is only 13 square feet, and this seems more than brawny enough. The time so far, from wrapping in plastic to finishing the laminating, was less than a hour.
The next day, after the resin was fully cured, it was a few minutes work to trim off excess glass with a band saw, give the fitting a sanding, and then apply a coat of epoxy to the outside to fill the weave.
| Trimmed fitting: After curing, the fitting is trimmed and painted, ready for installation. |
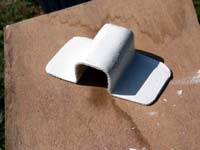
|
|
The boomkin holder was then ready for a light sanding, painting, and installation — all of which took only a few additional minutes.
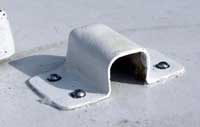 |
Installed fitting: The boomkin fitting is bolted to the stern deck.
|
|
| Installed boomkin: The boomkin is test fitted. A downhaul line is still needed to keep the boomkin from rising up from the pull of the sheet, especially close hauled. |
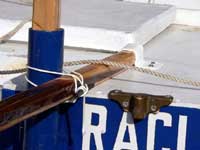
|
|
(Insert pictures installed fitting and installed boomkin here)
It’s a nice technique to keep in your bag of boat tricks next time you need a custom part.

Other articles by Gary Blankenship & Helen Snell:

|