 Custom Search
|
|
| sails |
| plans |
| epoxy |
| rope/line |
| hardware |
| canoe/Kayak |
| sailmaking |
| materials |
| models |
| media |
| tools |
| gear |
 |
 |
| join |
| home |
| indexes |
| classifieds |
| calendar |
| archives |
| about |
| links |
| Join Duckworks Get free newsletter Comment on articles CLICK HERE |
|
|
| Die Foldermaus - Part Two |
By Ian Titulaer - Canberra, ACT - Australia |
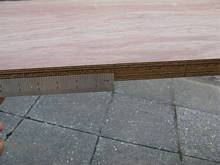
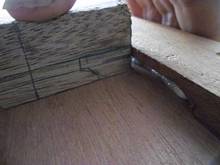
A roll your own mouse Part One - Part Two - Part Three My prototype was initially made with Sikaflex 11 FC and 2 inch fibreglass tape but given my bottom seam started to tear apart. I reinforced that with 3 inch wide strips of fibreglass I cut from some spare fibreglass I had lying around. It may be possible (or dare I say it likely) that there may be better fabric/glue options around and better hinging options as well. At a minimum I would probably recommend 3 inch tape be used for all seams. Others have sewed folding boats together using fishing line and a figure eight stitch and then sealed the gaps using waterproof fabric and contact adhesive or caulk (see the banana boat above). The duckchasers (or melon seeders) use contact adhesive and painted canvas. Some people have suggested ultra modern duct tapes such as Hurricane tape or 3M heavy duty Nuclear Duct tape for sealing the gaps on fishing line hinged folding boats. If you do this I suggest you have lots of emergency floatation on hand and don't try it in dangerous or cold waters. The construction of the hinges was to use a spacer between the two plywood pieces being joined and brown packing tape as a bond breaker. In prototyping I used three methods for spacing. My first try at using this method to generate a strong flexible hinge was done by tracing the plywood part out in cardboard and making the cardboard spacer marginally wider than the plywood. This worked rather well but was a fair amount of work. My next idea was to use a thin rope wrapped in the bond breaking tape and this too was quite effective though the rope tends to flop about in uncontrolled directions resulting in a slightly wobbly seam. This gave me a nice seam wrapped around the piece of 1/8th inch rope.
My next idea prompted by having the earlier joins to contend with was to use three thinner strips of cardboard and mount them stacked together which gave me exactly the height I needed in the joint. The thinner strips of cardboard were made in shorter lengths and were able to be added and joined end on end one at a time plus they were able to be bent to the slightly curved shape of the plywood panel quite easily. Unfortunately this had a slightly detrimental effect on how the join held together as the stresses of the joint tore directly out from the ends and the fibreglass/sikaflex blend peeled away from the edges. A fourth method combining the ease of the thin strip of cardboard (about 15 to 20 mm or around ¾ of an inch wide) should give a fairly good compromise between all the above strategies. The sequence of construction was to make regularly spaced marks along the panels where joins were to be made. Because I was using 50mm fibreglass tape I made the marks on the long sections 100 mm apart. It is important that you make these marks while the panels are stacked together so that the marks line up.
Remember to line up the marks on the end pieces as well. The marks here were more like an inch or so apart.
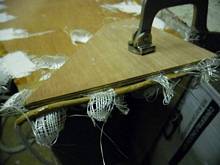
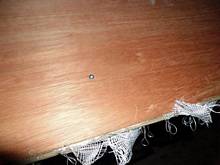
A short piece of fibreglass fabric half the width of the marks was then attached to the inside of the panels just to the right of the marks (remember we marked the insides of the panels with tape). Now when the panels are laid up next to each other the fibreglass should interlock. First spread some glue, working it into the surface then put the fibreglass square on top and then put a drop more glue on.
It works best if you hold the end of the section of tape and work away from the edge.
Now attach the end pieces to each of the panels. Here I am using the rope as a spacer. Though for most of the panels I used a bit of cardboard for the end spacers.
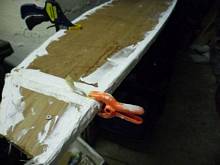
Once the ends are joined we can join the sides together. Here is the process of sticking on the spacer. (That clamp a the back holds the end piece flat while I am putting things together.)
Now clamp the panels together with temporary screws.
Make sure to run a bead of glue against the edge so that the join tapers nicely into the edge.
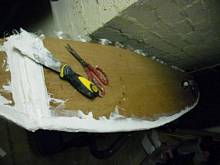
Fold over and glue the tabs and cover with a second layer of fibreglass all the way round.
At this point I had a sudden panic realisation that I had forgotten to make a spacer for the end to fold so it would be held almost rigid in the corner. I had to do a bit of judicious forcing, resulting in some damaged threads but in the end a bit of rope with come tape wrapped round it came to my rescue. I had to do a little more patching on this later.
Now to join the centre. Because at this point there was a half inch gap between the two panels remaining to be joined I made my spacer out of three layers of cardboard about 15-20mm wide (¾ inch). This made them relatively easy to wrap in the bond breaking tape and to bend to the shallow curves that make up Die Foldermaus a thumb width's wide. This was so easy and controllable I was able to match the edge precisely and was a lot easier to handle than the rope. Cardboard is also easy to get. Where I live there is even a home delivery service for cardboard - it is a little expensive but they do include a free pizza! I finished up holding the cardboard in place with the packing tape so it did not slide around when attempting to stack the pieces.
Stack the pieces, screw together temporarily and remember to shape the corner with a bit of rope wrapped in the bond breaking tape.
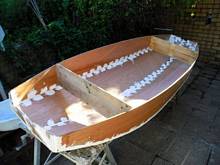
Now for the important bit - wait a while for the glue to set properly (a few days) and use 3 inch rather than 2 inch tape for the bottom (it would probably pay to use 3 inch tape all round). In spite of getting both of these wrong I was very proud of how nicely everything unfolded.
I used some 45 by 12 mm Meranti to make the gunwales. I pre-bent the wood slightly and pre cut some hook/finger holds under the gunwale (outwale) using a router but you can use anything that will leave a nice even hole underneath the outwale when it is glued in place.
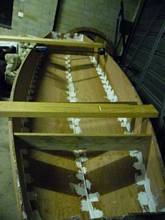
Apologies for the lack of photos of me attaching the gunwales but unfortunately the glue I used on the day (Sika Supergrip) is humidity dependant and while I was expecting it to go off quickly I was not expecting it to go off as quickly as it did and I was madly scrambling to attach the gunwales and clamp them in place and put in temporary screws. Normally the only place I can find humidity around where I live is in the dictionary, somewhere between "humbug" and "humongous". Hints: either find a glue that sets a little slower or apply the glue in shorter segments. Suffice it to say I attached the gunwales with the boat folded out and held in place with some temporary braces so the gunwales would be attached in pre bent form. This helps to reduce the amount of force required to open the boat when folding out but introduces the need for minimal force when folding in. Now to cut the thwarts. First use some temporary braces (sticks and spreaders) to set the shape of the boat and place your thwarts across the top with the edge 23and ¾ inches from the end.
Draw a pencil line from underneath the piece of wood using the edge of the inside if the boat as your exact guide. Take a strait edge pressing it against the inside of the boat and draw that line up the thwart. This gives you the exact angles (bevel) you need to cut to match the side of the boat. If you are cocky like me you will then flip your piece of wood over, angle your hand saw according to both lines and cut a perfect matching bevel on both ends, or you could be sensible and have a practice run on a bit of scrap wood or two, or three.
Because the slope of the sides is not exactly perpendicular you will need to cut inside the line to the amount you need to make the two ends the same width as the sides of the boat.
Now you will need to temporarily fix the thwart in place using a clamp to stop it sliding towards the centre of the boat. The pressure of the sides attempting to fold in was more than adequate to hold it in place for me. A temporary tack or screw or nail might help if yours is not so well behaved. Now drill some pilot holes for the dowels that will hold the thwart in place. After drilling the first of the holes insert a small nail to stop the thwart moving while you drill the rest of your pilot holes. At this point it might be a good idea to mark the thwarts with whether they are the back, front, left or right. Here I have marked this one PS - for Port Stern.
As you may be able to see I have marked the spread of measurements I used to position my dowels on my bit of two by four using millimetres. Now I drilled the receiver holed in the gunwales taking care to drill in line with the same holes I drilled in the thwart. I took care not to drill through the side of the gunwale all the way and patched the small pilot holes I had made for aesthetic reasons but there is no real reason a straight through drill instead of making the pilot holes would not work. It just might not look as nice. I used a 15mm Tasmanian Oak dowel to join the thwart and the side. Because of the vagaries of drilling and dowel placement the holes in the side had to be reamed slightly with a rotary tool for the dowels to go in smoothly.
At this point I was just about ready to throw it in the water when I noticed two problems. Firstly, the two inch tape along the bottom was starting to pull free in a couple of places. Secondly, the place where the bottom had been sitting on the saw horse as I had been working on it had worn through. There were a few reasons - firstly, 2 inches was not wide enough, secondly, I did not leave the glue to cure for long enough before I placed stress on it, thirdly, I perhaps should have rounded the edges of the panels before I glued them together and fourthly, I may have been a little ham fisted in my handling of the boat, a pool noodle or towel on top of the saw horse would have helped prevent the wear through.
This is of course as I have stated, one of the reasons we either prototype or learn from other's mistakes. Now to ensure the boat stayed together and to hold the emergency floatation in I decided to add some tie downs. These straps or ropes to hold the sides of the boat in which is handy as the only thing holding the thwarts in place is the sides of the boat pushing in. The ropes prevent the unlikely event of the sides moving apart and releasing the thwarts. I looked at all my straps and bungy cords and all the hooks were just a little high so I made my own hooks out of wood. You may not need to do this if you have straps with hooks that don't hang over the top when fastened. To make the hooks first I work out how big the hooks need to be and mark them out.
Then I cut the hook out. Part of the problem with wood is that it has a grain and it can split more easily along the grain than across it. As a result the wooden hook needs to be reinforced across the grain. Luckily fibreglass strands abounded in my workroom due to the fiddly nature of cutting 3 inch strips from cloth and when I ran out, picking a few inches off the end of the fibreglass ribbon provided a fibreglass thread that was quite long as the thread zigzags across the ribbon and unravels reasonably easily.
I used five minute epoxy and was on my way before I knew it. Just remember to learn how to tie a good trucker's hitch and slip the hook as far along the hole as it will go towards the end before you tie it off or the limiting of the size of the holes will have been in vain.
I spent a deal of time looking at options for removable floatation, including testing polystyrene and PET bottles glued together with expanding filler type spray foam, strapping a boogie board onto the top of the end and thinking about buying a few litres of proper pouring foam all using the end of the boat between the frame and the end as a mould. Doing this neatly would make the boat look even more mouse like but at the expense of lots of fiddling about and thought. I was even considering incorporating a bottom 2 litre bottle accessible to be filled it with sand or metal ballast to make the boat less tippy. In the end I just grabbed a couple of large poly tarp material tartan bags and filled them with a couple of large polystyrene blocks, some pool noodles a few inflatable pillows and bits and pieces. A small bean bag would do as good a job. Now I took it for a test spin.
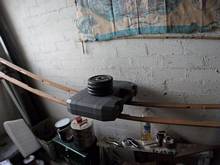
It became readily apparent that there were a few more small holes that I needed to fill and that it required a coat of paint and a skeg or fin or two would make it handle better. It seemed to paddle along quite nicely but when I stopped paddling it tracked along ok for a while and then seemed to go into a spin out stall as it slowed (without the skeg). Tip for getting it open. While it is relatively simple to open Die Foldermaus it does have a lot of tension in it and if you are the sort of person who only has two hands I am going to quote an oft repeated axiom in wood working - you can never have too many clamps, or in this case you can never have too many spreaders. The sorts of clamps below have has two modes - clamping and spreading - when used as a spreader they make the job of inserting the removable thwarts very easy. When not using the spreader it becomes a much more difficult task. I am sure there are other methods as simple as a hinges in the thwarts etc. but this has worked to make it easy for me as I had them in the shed.
The cheaper/smaller spreading clamps are used with a bit of pipe or a lump of wood with a hole in it (hardwood or softwood with a bit of reinforcement) used to extend the range of spreading. Continues next month... |

