| For many years now, I’ve been
keeping a dark secret. But now the time has come for me to confess
– I like Stitch-and-Glue as a building method for boats!
There, I’ve said it!
Now there have always been people around who do things for sensible,
practical engineering reasons. These people found out that stitch-and-glue
made sense fifty years ago, and they used it for the simple reason
that it worked. However, there are other types (like me) who worry
too much about what people think, and who have avoided the taped-seam
joint like the plague.
For me, the traditional look of clinker (lapstrake) construction
had, and still does have, an attraction which is difficult to
escape. I knew that if I built a boat that way, she would be considered
a ‘proper’ boat by the traditionalists, and my fragile
ego would remain intact.
Other construction methods which I thought I could use and still
be thought of as a ‘true-wooden-boat-person’ included
plywood planking over stringers and frames, batten-seam, strip
planking, diagonal planking, and strip-diagonal, to name a few.
With this in mind I stumbled along a boatbuilding path stretching
nearly forty years, and was generally reasonably happy with what
I turned out.
What brought me face-to-face with the prospect of actually building
a stitch-and-glue boat was my introduction to the work of the
late Philip C. Bolger in about 1979. In his book ‘Small
Boats’, Phil endorsed the method, and indicated that he
had been using it since the early sixties.
Now, I knew quite well that Jack Holt had been designing stitch-and-glue
boats for many years, but it wasn’t until I started reading
Phil Bolger that I took the method seriously. Subsequently, I
came across more and more stitch-and-glue designs from people
whose judgment I trusted, and finally, in about 1985, I built
a stitch-and-glue boat – a Bolger ‘Nymph’. This
boat was everything the literature claimed – light, clean,
shapely, and strong – and so very simple to construct and
maintain.
 |
Bolger ‘Nymph’ |
In the year 2000, I left a twenty-five year career to follow
my own star, beginning a ten year odyssey as a boatbuilder working
professionally. In that time, I’ve built about fifty-three
boats, and repaired many others. This full-time exposure to small
timber boats has given me the opportunity to gain first-hand experience
of a wide range of building methods - from the point-of-view of
ease of construction, structural strength, maintenance, repair,
durability, economy, and so on.
Each building method lends itself to particular designs, and
certain designs and construction methods are mutually-exclusive.
For a complex round-bilged hull it is not possible to use stitch-and-glue
(although you can get close with knowledgeable design), and for
such hulls I prefer the glued-lapstrake (clinker) method.
One notable building project we undertook was a Phil Bolger ‘Harbinger’,
which is a 15ft x 7ft 1” Catboat of the New York model.
She has a most spectacularly shaped hull, with sweeping curves
which change from convex to concave in all directions. Originally,
this boat was designed to be built using plank-on-frame carvel
construction, but the owners wanted to be able to store her out
of water on a trailer, so the carvel method was ruled out (a carvel
boat should be kept wet in order to prevent the plank seams opening).
At the time I was much influenced by the work of the Brooklin
Boatyard in Maine, and I elected to build ‘Harbinger’
using the strip-diagonal method, which promised to be strong,
light, tolerant of trailering, and suitable for the complex hull
shape. In April 2002 I wrote to Phil Bolger to obtain his permission
to alter the construction and he replied saying, “The construction
you propose is the best for the purpose barring expense. Plywood
lapstrake would be the alternative. The ‘Harbinger’
hull shape is ideal for either.” In a later response he
also said, “Harbinger looks very good, though the amount
of work in that construction is scary….”
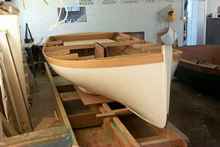 |
Harbinger |
Phil was correct about the amount of labour in the ‘Harbinger’
job! During construction we put in, and removed, eighteen thousand
stainless steel staples in the diagonally-planked layers –
and that was after having built and faired the internal strip-planked
section of the hull. These days I would use vacuum-bagging techniques,
but even so, it would be a very big job for a small shop.
Most of the boats I’ve built have been done using the glued-lapstrake
(clinker) method, and it is an exceptionally elegant way of producing
a shapely hull. However, it does have a few shortcomings, the
most important of which is the vulnerability to damage of the
edge-grain on the plank laps i.e. the stepped edges of the overlapping
planks. Other problems include the time required to build the
strong-back and molds, and the need to spile (determine the shape
of) each pair of planks. The final limitation is the need for
very high-quality plywood, as the strength of the hull is largely
determined by the glue bonds between each pair of plank faces,
and between the two outermost veneers of the plywood.
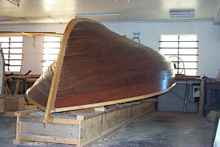 |
Bolger Hope |
Now, to get back to the point of the article – a stitch-and-glue
hull can be built from panels of plywood which have been marked
directly onto the plywood sheets, and cut-out using a jigsaw or
similar. There is no need for spiling of plank shapes, and most
importantly, there is no need for any sort of strongback or mold
– as long as the designer has produced accurate panel expansion
drawings, and as long as the parts are marked and cut accurately.
Another major saving of time, labour, and money, is brought about
by the absence of most of the normal longitudinal framing such
as chine logs and sheer clamps (this is a generalisation, dependent
on the particular design). Chine logs which don’t exist
will never need to be cut and beveled, they can’t rot, and
they have zero weight!
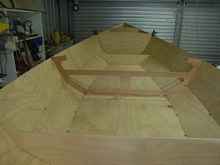 |
Stitch n Glue |
If a stitch-and-glue boat is correctly designed and accurately
cut, she can only have one shape when put together – think
of peeling a banana, removing the banana flesh, and then re-assembling
the skin – the shape of the assembled skin will be the same
as it was before being peeled. That is why you can get away without
a strongback and molds when building a stitch-and-glue boat –
it is the two-dimensional shape of the planks (or skin) which
determine the three-dimensional shape of the finished boat. Normally,
you do not need an elaborate mold.
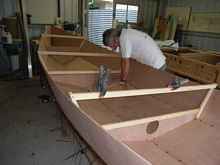 |
Stitching the hull |
Over the millennia there have been plenty of other examples of
boatbuilding which can be done without a mold – Viking Ships,
Birch Bark Canoes, Flat-Iron Skiffs, Pirogues, to name a few.
But for our times, the stitch-and-glue method presents some extra
advantages. For example, the existence of CNC cutting facilities
allows the rapid and economical production of pre-cut kits –
something for which the stitch-and-glue method is uncommonly well
suited.
I mentioned earlier in this article that the edge grain of the
plywood is particularly prone to damage and water soakage. Stitch-and-glue
boats have this vulnerable edge grain buried in thickened epoxy
and covered with epoxy/glass sheathing. Not only that, but the
large surface area of the glass covering of all of the joints
means that stresses are dissipated into the structure quite gently
and evenly.
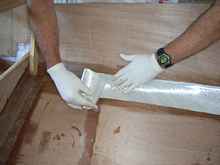 |
Taping the fillets |
Space limitations prevent me from writing as much as I would
like, so those who are interested should have a good read of some
of Jim Michalak’s and Dynamite Payson’s books, and
especially Sam Devlin’s excellent text called, Devlin’s
Boatbuilding, which is the best one on the subject that I have
found.
You can also find plenty of free photos showing the process on
my website, www.baysidewoodenboats.com.au
, under the buttons titled, ‘First Mate Photos’ and
‘Flint Photos’.
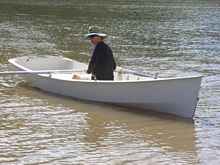 |
Flint |
Stitch-and-glue can produce a light, strong, and shapely hull
of the highest quality. You don’t have to be an expert woodworker
or a qualified boat-builder – but you must follow the rules
and pay great attention to detail.
***********

|

