From this
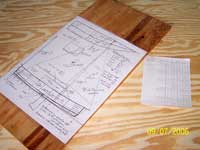 |
Drawing and
offsets
(click images
to enalrge) |
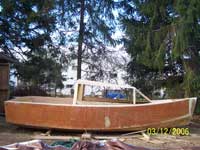
To this
| Large windows all
around and sitting headroom yield a great view
from within. Roof hatches open to give a 2’
wide slot up to the mast box. |
|
…. in five fascinating, challenging, occasionally
frustrating, and deeply satisfying months. ‘With
a little help from my friends’.
The first week of July, 06‘, after putting
up a 12’ x 20’ screen tent from Sears,
and building a strong back, work on “Wanderer”
commenced for real. What follows is an overview of
that effort; neither a building log nor a ’how-to’,
but enough I hope to give Duckworks readers a good
sense of what I‘ve been up to. As with the design
itself, there are several places where my approach
is a bit different from the usual … but still
sound, I hope.
The first couple of weeks were devoted to scarfing
the bottom sheets cut from ½” BC exterior
ply, carefully laying out the bulkheads and stem on
3/8” ply, adding 1x2 edge reinforcement, mounting
the bottom on the strongback and blocking up the rocker,
cutting the bottom to the measured line. The transom
is ½”. Finally each component was set
in place, leveled and measured again, braced and clamped,
and screwed and glued. Since I am building directly
from the offsets generated on the Carlson Hulls program
and my one, 2” = 1’ drawing there is a
lot of careful measuring. It was a strange blend of
satisfaction and relief when the transom and bulkheads
rested directly on the marks.
(I’m referring to it as a “bottom”
as there will be a ‘swing keel’. or swing
‘off-centerboard’ through and below it.
The experts and purists can help me get the terminology
right … as long as it builds correctly.) Since
cost is a driving consideration I bought four “good”
16’ 2x4’s and with a neighbors table saw
sliced them into four stringers (chine logs? …
I‘ve built several radio-controlled airplanes
and that terminology is in my head). Plus 1x2‘s
for their many uses. With the upper and lower stringers
in place the shape and dimensions of the sides and
lower panels are defined. (dead rise panels ? .. bilge
panels ?).
Voila … no tedious, worrisome lofting!
The general approach follows the ‘bottom up’
scheme you see on John Welsford’s lovely designs
(and elsewhere), but I haven’t seen this approach
to getting the panel dimensions anywhere else. I couldn’t
get the “Plyboats” software to download
earlier in the year and this seemed logical to me.
I did get it running on a recent rainy day and if
she sails as expected I may type in all the data and
prepare some more adequate plans. This would make
a “stitch & glue” approach possible
instead of my “screw and glue” method.
I’m happy with what I’ve got, though;
it seems pretty stout and another 10 or 20# is of
little concern. Anyhow, you can imagine my delight
when, with the stringers in place, the shape looked
to be just like the Hulls generated views !
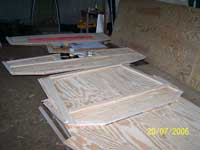 |
Transom and
bulkheads laid out (forward one later cut at
hull level) |
| Bottom measured
& cut; rocker blocked, & stem …
lots of use for that level |
|
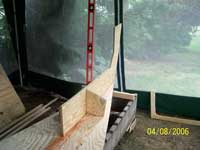 |
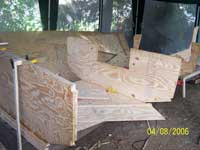
Little by little
it begins to emerge from the pile of wood |
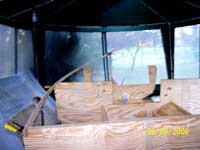
| When the first stringer
bent and fit it was a great encouragement |
|
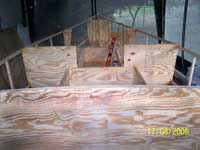 |
Stern to stem
.. seat supports help hold the bulkheads to
measure |
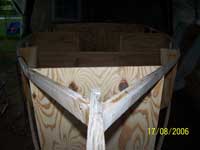
| and stem to stern
.. An illustration of the “1 - 2 %”
rule |
|
This seems like a good place to mention my “1
- 2% rule”. I’ve adopted it as a corollary
to John Welsford’s admonition that ‘there
are few mistakes that epoxy filler can’t fix’
(I paraphrase). Take a look back at the second picture
at the top of the article. The shape at the bow and
other “1 or 2%” imprecision’s are
pretty hard to find and I’m betting they won’t
be noticeable on the water either.
As noted in a review a couple of months ago, I’ve
used GelMagic
for the most part, although I did try Gorilla Glue
on some non-stressed components. I also bought a set
of clamps from a local big box and have used them
a lot, but somewhere on Duckworks I read that sheet
rock screws were great for temporary joining. They
are, and I’ve used them a lot, especially on
the sides, bilge panels (?), decking and roof which
you see further on. They set in the drill tip and
start easily .. no little thing when working alone,
as I generally have. Then they back out, sometimes
giving the drill a bit of a help to break them free.
No sheet rock screws have been left in place, but
there are a couple dozen brass screws in major joints.
As I’ve gone along I’ve left fewer as
I realized how strong the epoxied joints are. Oh,
and I’ve used some waterproof formula Titebond
III to add the roof and decking. It is time consuming
and awkward to mix batch after batch of epoxy - and
handle the drill and screws. But all of the hull joints
are epoxy.
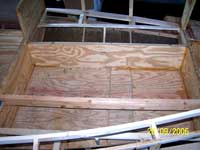
As I went along I added the seat supports in the
cockpit and on one side of the cabin. This served
to hold the transom and bulkheads in position. You
will note only a port side cockpit seat brace and
a temporary 2x4 for the starboard side. That’s
where the off-center board/keel and it’s case
will go. That’s a project for this winter when
I can leave the boat covered most of the time and
work on my partially closed back porch.
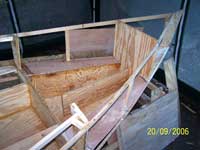
There is also a smaller forward bulkhead measured
directly from the in - place stringers. This forms
an anchor compartment above and flotation compartment
below while adding considerable strength to the bow.
Two other flotation compartments are either side up
there. There are vertical 1x2 pieces to complete frames
every 20”along each side. And with the ease
of working while standing with the boat still upright
on the strong back I added seat supports in the cabin
and framed out flotation compartments along either
side if the cockpit beneath the side decks. There
is about 3 cubic feet there and 2+ forward, entirely
sealed. I even remembered to paint them inside as
I went along. With the large, “tight”
stowage compartments beneath the cockpit and cabin
seats, and more stowage beneath the foredeck she’ll
be pretty hard to sink. Plus she’s a modified
birdwatcher and it will be pretty hard for any water
to get into that cabin. See the tests Jim Michalick
has run.
 |
Cabin seat supports
.. it is easier to get at some of this work
now than later Forward starboard flotation ..
There is another beneath the anchor well |
| Forward starboard
flotation .. There is another beneath the anchor
well |
|
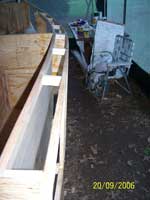 |
Starboard cockpit
aft flotation compartment, backside to cockpit
seats |
The first week of September I took a break and we
went up to Trout House and rented a cottage. This
is northern Lake George, Hague, where I first learned
to sail in 1974. It was a dad’s dream come true
as my daughter and son-in-law came up for a weekend
bringing two of the four grandchildren for their first
Adirondack vacation. They‘re still talking about
it. (My son’s two live in Oakland, CA - hope
to have them back east for the launching next May)
 |
Daughter Cambria,
Mattie & Kareem Jr enjoy one of our cleanest
lakes |
| Son-in-law Kareem
Hill loves the water and will learn to sail with
me |

|
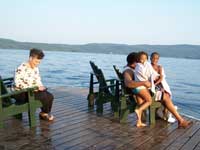 |
Wife Terry et
al. The boat will be dedicated the “Terry
Jeanne”. |
| Every Saturday and
Sunday the Star fleet - and other classes - race.
Lake George is 32 miles long and about 3 miles
wide up here |

|
+
When we returned I spent a couple of days measuring/outlining the sides of
¼” lauan ply directly in place against
the stringers, cutting them, and screwing/gluing them
in place (epoxy). They were joined in place with an
8” piece fitted between the stringers. This
was really quite straightforward. And when I flipped
the starboard side pieces over and tried them to port
it was a mirror image … well, almost …
within ¼” - 1 - 2 % rule! With these
‘glued and screwed’ in place I shanghaied
son-in-law Kareem, and neighbor, Luke Hayden, to turn
it over. A real milestone.
The 3/8 deadrise panels (?) were made by using shelf
paper to draw a full size pattern in place, then I
cut the scarfed pieces ½’’ oversize
all around. Again, they were mirror images ! The bevels
on the bottom were cut using my little jigsaw and
a handsaw, leaving a ¾” - 1” surface
against which to glue. I screwed/glued them in place
(epoxy) and trimmed them with my jigsaw and hand saw
to the gradually steeper bevels matching the bottom.
This I confess was a job and no doubt motivated me
to figure out they Plyboat download. But it worked
… see below!
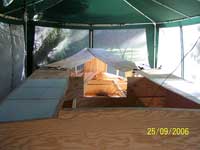 |
Sides cut a
bit oversize, interiors of side flotation compartments
painted |
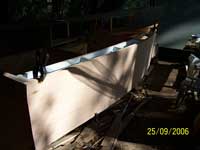
| Sides being fitted
… later “glued and screwed”
.. an unusual method |
|
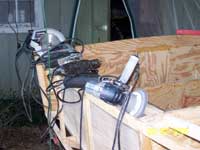 |
These are the
power tools used .. a hand plane has had a lot
of use too |
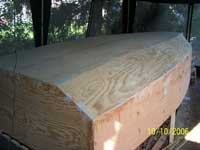
| A hull that looks
just like the Sarlson program on the computer!
(Sorry, no pictures from fitting those bilge panels.)
|
|
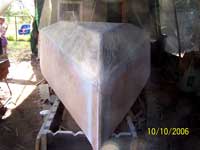 |
Notice the “false”
bow pieces blended to the angled forward stem
- Granddaughter Mattie checking on Grandpa |
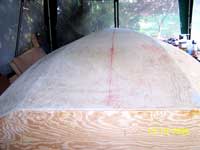
| Beamy … for
stability and spaciousness in a small boat. |
|
I’m sorry that there are no pictures of fitting
the bilge (dead rise) panels before turned it over.
And only two of the fiber glassing. In addition to
it’s being awkward to use the camera when working
by myself, let alone with sticky, epoxy-gloved hands,
I was feeling the pressure of getting enough done
to get the tent down and boat covered for the winter
months.
The first five feet from the bow has 6# fiberglass
tape reinforcement. The bottom and bilge panels are
then covered with 6# cloth, double overlapped the
length of the boat. The sides have 4# cloth, again
double overlapped the full length. So triple thick
joints at the bow 1/3rd; double thick the remaining
2/3rds. This yields considerable strength to these
joints which already are epoxied with ample surface
width. The whole glassing process took about a month.
When done and it had set a couple of days a neighbor,
Joe Shillington, helped me slide/turn it back over.
This time the strongback is removed and it is blocked
on several planks about 3” off the ground.
The “workshop” was just big enough and
served pretty well through the Summer months. I even
had lights to help in the latter part of the evening.
It held up for three months, but in October a big
storm caused a support to break and I came out in
the middle of the night to find three or four inches
of water in side. PANIC ! I bailed it out and dried
it with towels and paper towel, then ran a small heater
through the next two days. There is no sign of swelling
or delaminating and it seemed entirely dry so I proceeded
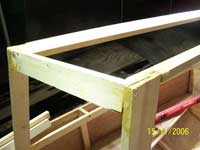
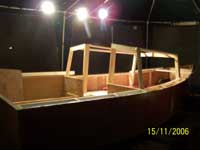
to frame up the cabin, using mostly 1x2. The top cabin
sides are 1” x 4” cut to the curve of
the side deck. The is no fancy finish carpentry here
but every joint overlaps and it is pretty sturdy,
especially with the roof and those lower side panels
in place.
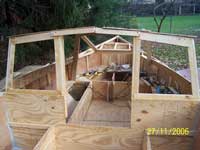
The two forward corner posts are 1” x 3”
poplar, doubled either side of 3/8 ply … very
sturdy. Then 3” poplar runs from those to the
upper mast box, which at that point is 42” above
the base of the mast. As I noted in the previous write-up,
I hope to do without shrouds on the side although
it won’t take much to use them if needed. I
know I can lift the whole boat by pulling on a front
corner post!
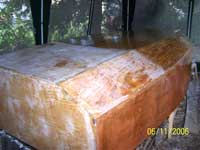 |
Fiberglass in
place … sanding off the high spots before
a 2nd filler coat. |
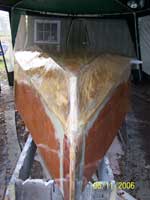
| A pretty clean entry
and easy flow to that beam .. note added bow panels |
|
 |
Simple, sturdy
cabin framing .. and it will be hidden by paint |
| Worked into the
evening sometimes, but it was too cool by November |
|
 |
Temporary pieces
until the roof slot is cut and hinged .. the
mast is stepped by walking it in, setting it
in the lower box and raising it into the upper
slot |
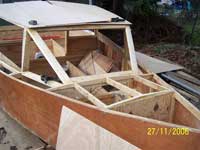
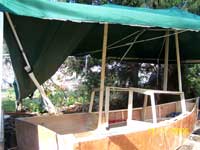
The foredeck was framed out with plenty of support
so it can be walked on and the kids can sit up there
when they are older. The windshield was also framed
out. But then a second disaster! Serious worry and
high blood pressure. Another storm broke the tent
frame at several points, it completely collapsed at
one end, and more water got in to the boat. I had
to take the tent down, with help of a friend - George
Sinkler. It was a mess but there was less water and
with five balmy, Indian Summer days and the little
heater it dried out again. With several weeks gone
by and no sign of further trouble my blood pressure
is normal again.
 |
Foredeck framing
… lots of scrap lumber by this stage |
| Disaster - again
... temporary sticks so I could bail it &
get it dry. Then the sides were cut off the tent
taken down. Winter is almost here anyhow. |
|
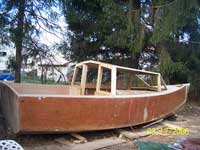 |
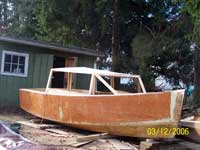
Decking in place
and trimmed … 5” sides and 20”
X 30” up front behind the anchor well.
There will be a bow sprit too. |
| It’s a BIG
little boat. |
|
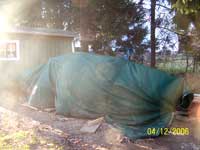 |
All wrapped
up … double tarps with lumber to assure
drainage - outer one the remainder of the tent.
Cockpit covered with a wooden cap that will
be used when it’s finished too. Dry as
a bone after two rains .. whew ! |
Over the last month I have climbed into the cockpit
and cabin several times and let myself picture being
on the water. Great fun! There is lots of room and
great visibility. Two people can comfortably sleep
for a night or two and there is room for lots of gear.
With the main, self-tending jib and mizzen it should
sail comfortably, with a strong electric trolling
motor as auxiliary power. A small 2 - 4 hp 4-cycle
outboard for fishing and casual cruising will extend
the days I can use it. I’m beginning to dream
about some outings next Summer !
Over the next three months I will build the swing
keel / off-center board and case, then find a warm
day and install it. On other warm days I’ll
finish hinging the roof doors, build the drop boards,
and maybe convert the rudder I’ve got from my
old Wildflower to a balanced, naca foil. And there
will be a jib and mizzen to make from polytarp. I’ll
measure, cut and tape them myself, then send them
along to my sister who has agreed to sew them. I’d
like to get two or three seasons and then, with experience,
perhaps cut a genoa and other new sails. These, like
all of my materials so far, will be ordered from Sandra
and Chuck, without whose Duckworks resources and community
I would never have come this far.
Come March and April I’ll build a mast and
sprit for the Mizzen, a boarding ladder for the port
side of the transom, and install the rest of the rigging.
Paint looks like white with orange trim along the
upper chine. Maybe - maybe - the deck will be covered
with 4 oz. cloth and left clear … or maybe the
only bright work will be the rails on the roof and
rub rails the length of the hull. This has been a
splendid adventure and I am indebted to every one
who has pitched in, on the net and in the back yard.
There’s lot’s left to do, of course, including
making time to get the garden in, but I aim for a
launch by Memorial Day so that I can enjoy the sailing
season.
And then I hope I can get to meet a few of the good
folks I’ve met along the way and show her off
a bit !

Articles by Bob Throne

|