| A Micro-Shanty
Style Houseboat as built by Bill Nolen
Part
1 - Part
2 - Part
3 - Part
4 - Part
5 - Part 6
- Part 7
When I ended Part
6 of this construction log my parting
words were "Tune in next month for more daring-do
boat building details…and learn first hand the
many ways I can delay, screw around, mess everything
up, and then delay some more!"
When I wrote those words I had little idea just how
much time would pass before I was able to write Part
7. I won't bore you with the many excuses that I could
come up with, but I will say that getting old isn't
for sissies!
When Part 6 ended I was in process of making an old
fishing boat trailer into a suitable trailer to haul
the Harmonica. During the conversion I used three
carpet covered 2" by 4" treated wood bunks
or runners to support the boat's hull. I also installed
boat guides on both the front and rear of the trailer.
With the purchase of a new boat winch, and a trailer
jack, the trailer was ready to use.
After finishing work on the trailer I thought that
I'd better load the boat onto the trailer before I
added more weight to the boat. My first thought was
that I would hire some strong young lads to lift the
boat onto the trailer, but then I got to thinking
about the liability if one of the lads injured themselves!
So I decided to load the boat myself with the help
of my adult son. After pondering for some time about
the best way to accomplish this, I came up with this
idea; I'd remove the trailer's wheels thereby lowing
the trailer to the ground. We would then roll the
Harmonica to the trailer's rear end, using the Harmonica's
dolly, and then winch the boat up onto the trailer,
sliding it on the trailer's runners.
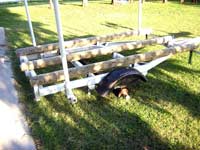
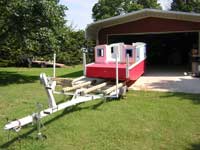
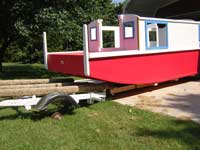
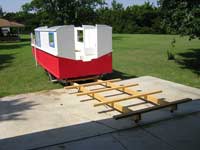
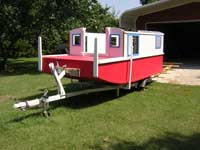
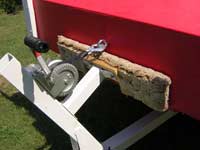
As you can see by the photos it actually was quite
easy loading the boat on the trailer. I splashed water
on the three-carpeted runners to aid in the boat sliding
onto the runners. With my son pushing on the rear
of the boat, and me cranking on the trailer's winch,
the boat slid onto the trailer with very little effort.
Of course, my son, Gary, might tell a different story!
Although there wasn't very much force applied to the
bow's eyebolt, I was glad that I had reinforced the
bow of the boat where the bow eyebolt was attached.
 |
|
 |
|
 |
|
After loading the boat, and reinstalling the trailer's
wheels, I moved the boat back into it's building,
and started work on installing the plywood for the
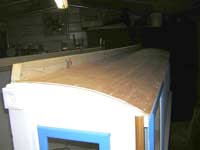
roof. I had changed Jim Michalak's design by making
the roof's topside's round instead of flat as shown
on the plans. I did this to increase the amount of
headroom in the cabin area. Plus, I like the rounded
look much better. Sort of like the roof of an old
Gypsy wagon! After all, I had already named the boat
"Gypsy"!
However, by making the "bird watcher" style
roof curve on each side I did create some problems!
If a person follows Michalak's plywood cutout guide
that is part of the boats plans, there is plywood
left from the building of the hull for the boat's
roof. So I had 1/4-inch plywood for the roof sheeting.
My first attempts to force this plywood into the curve
of the roof didn't work out very well! The problem
was that when the plywood was curved into place the
plywood sheet would dip down into the open space between
bulkheads.
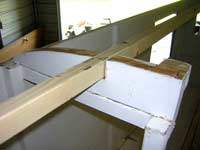
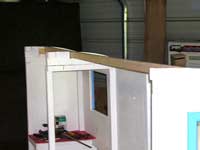
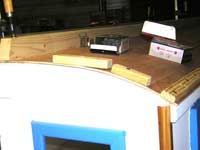
I should have purchased 1/8-inch plywood or door
sheeting at this point, but since I already had the
1/4-inch plywood on hand, I decided to add a 1-inch
by 1-1/2-inch beam across the top of the bulkheads
to eliminate the dipping down of the plywood. The
down side of doing this is the beam does reduce some
of the additional headroom I obtained by curving the
roof!
 |
|
 |
|
 |
|
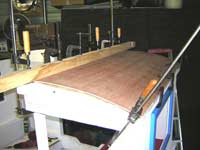
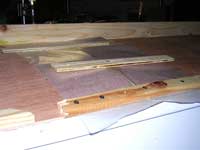
As you can see in the photos, I used metal clamps
and wooden strips with drywall screws to hold the
plywood sheets in place while the glue cured. Prior
to attaching the plywood to the top of the cabin's
bulkheads I glued the roof's plywood sheets to the
bottoms of the 2" by 4" beams. Then when
I clamped and glued the beams into place on the top
of the bulkheads, it made the bending of the plywood
sheets much easier. After the glue cured for two days,
I removed the clamps, wooden strips, and screws. To
ensure that the roof would stay fastened down during
highway trailering, I installed wood screws with finish
washers all along the roof's edges.
I then applied a coat of primer to the roof, and
after it dried for a day or so, I applied two coats
of light blue latex paint. I wanted a color that would
reflect the summer's heat, but wouldn't glare like
a pure white color.
At this point in the construction of the Harmonica
the boat was ready for a test launch. However, some
health problems of mine flared up, and I slowly stopped
working on the Harmonica. After a month or so passed
I realized that it was unlikely that I would, anytime
soon, be able to finish and launch the boat.
So I decided that if the boat were ever to get on
the water, someone else would have to take over the
final construction details and launch the boat.
Shortly after posting a message on the Michalak
Yahoo Website, stating that I wanted
to sell the Harmonica, a gentleman named John Galloway
in Illinois contacted me and bought the Harmonica.
A friend of Mr. Galloway picked up the boat, and
delivered it to him in Illinois the following weekend.
Within a day or so John was testing the boat on the
Wabash River in Illinois. John stated that he was
quite pleased with the boat's handling and stability.
(I was just happy that it floated and didn't sink!)
Here are some photos John took the day he launched
the boat, and the Harmonica's first trip on the river.
John plans on using the Harmonica for long floating
trips down the beautiful Wabash River with family
members. He is currently painting the insides of the
cabin, and adding decorative trim to the boat.
Although I regret not being able to finish and launch
the boat, I am very pleased that Mr. Galloway is able
to enjoy the boat in a way that I had hoped to do.
The Harmonica is a great design that offers a boat
builder many options, and when finished, it is a great
family boat!
Jim Michalak boat designs are great for a novice
boat builder, and his plans are well worth the cost.
This morning I received three photo from John Galloway
showing the window framing and metal trim that he
has added to the boat.
Bill Nolen
Fall 2007 |