| When I started building a Ducktrap Wherry last
winter I realized right away I did not have the proper
clampage to do the job. Like so many of you I have
a bunch of “C” clamps and lots and lots
of spring clamps, but except for very largest spring
clamps none are suitable for clamping laps. So, on
a fine brisk morning I decided to remedy the problem.
I studied what I could find on clamp making and determined
they are really not something that should take an
engineering degree to figure out. So I came up with
this simple but effective design that will no doubt
become the world standard lapstrake clamp. You can
build them for under 50 cents each – if you
build about 80 or so. Here is the design – free.
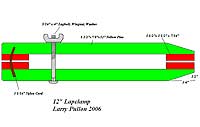 |
12" Lapclamp |
To build the clamps I bought two 2”x10”
yellow pine boards, 100, 5/16’x4” lagbolts,
100, 5/16” washers, and 100, 5/16” wing
nuts. I happened to have 50ft of ¼” nylon
cord on hand. Material cost was about $40 which made
my clamps cost about 50 cents each. Labor is always
free for home stuff!
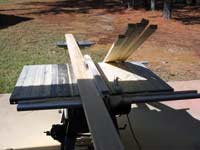 |
I ripped nine
7/8”x 1 ½” wide boards out
of a 2x10 then ripped the remaining piece to
7/16”x 1 ½” wide. |
Setting up a clamp assembly line, I ripped nine 7/8”x
1 ½” wide boards out of a 2x10 then ripped
the remaining piece to 7/16”x 1 ½”
wide. There was a sliver of wood left… Next
I set the chop saw and proceeded to cut all but the
last two boards into one foot long blocks –
I think I got 170 blocks. Then I set the saw up to
cut 340 1 ½” x 1 ½” blocks
to serve as the clamp’s pads. With that done,
I next beveled one edge on each block – you
can skip this, it is just for visual effect –
but then you want to look good when you are boat building!
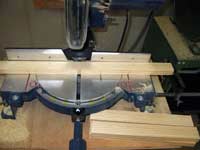 |
I next beveled
one edge on each block – you can skip
this, it is just for visual effect – but
then you want to look good when you are boat
building! |
Moving to the drill press I set up a jig to drill
holes in the blocks for the clamping bolt. It could
have been anything – but I drill the holes 3
½” from the end. Once holes were drilled
into all the one foot long blocks I set up a clamp
assembly line on a sawhorse table. I put a heavy drop
of Titebond II glue on each end of the blocks and
glued on a 1 ½”x 7/16” block on
each end. I could have held it together by tightening
the clamp – but I chose to use the nail gun
to hold everything in place until the glue dried.
Besides nail guns are cool!
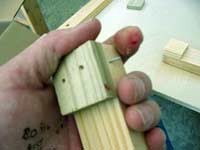 |
Wham! The nail
shot out the side of the block right into the
tip of my left index finger! |
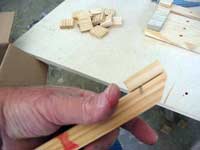
About the fifth or sixth block - wham! The nail
shot out the side of the block right into the tip
of my left index finger! Ouch! Razza, frazza, dip
wad, shifting sand!!! (cuss, cuss, cuss).
Once I stopped the bleeding I figured the odds of
that happening again were very remote and went back
to work. Holding the clamping block between my left
index finger and thumb, I moved quickly, firing two
1”x 16 gauge nails at a potent 95 psi. into
each block. That should hold the sucker until the
glue dries! Arr, arrr, arr!
 |
I figured the
odds of that happening again were very remote
and went back to work. |
And three clamps later – blam! Another nail
shot out sideways – right into my left thumb!
Ewwwww! Awwwww! Son of a !@#$! (major cussing this
time!) There might have even been a tear running down
my cheek - but you don’t know that for sure
since you were not there!
Fortunately the inside of my thumbnail stopped the
nail from blasting completely through my thumb –
that would have been gross! While I was capturing
the “Kodak Moment” for your pleasure I
recalculated the odds that a nail would blow out the
side of a board again. I came up with 1:1 or 100%.
I was right - it happened 12 more times while I made
the rest of the clamps – I held the blocks differently
though, so no more nails fired into my poor fingers!
 |
I installed
bolts, nuts, and washers, and then it was off
to the belt sander to remove any wood burs or
splinters and round the corners – just
to make them look nicer. |
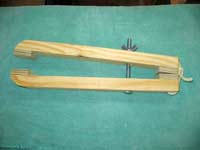
After nailing all the clamp pads to hold them while
the glue set, I installed bolts, nuts, and washers,
and then it was off to the belt sander to remove any
wood burs or splinters and round the corners –
just to make them look nicer. Once the sanding was
done, I went back to the drill press to drill holes
for the cord. The cord is there to simply keep the
clamp halves aligned when not in use. They make it
so you can pick up a clamp and use it right away without
jiggling around with the halves.
 |
And just like
that – in easy day I had made 85 nice
clamps that will serve me years to come. |
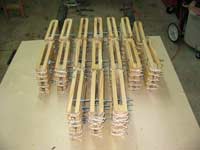
And just like that – in easy day I had made
85 nice clamps that will serve me years to come. They
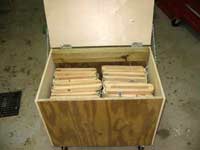
would have cost a fortune from supply houses! I saved
so much $$ I could even afford to build a plywood
box on wheels to keep them out of the way!
 |
I saved so
much $$ I could even afford to build a plywood
box on wheels to keep them out of the way! |

Articles by Larry Pullon

|