| Click
here for Part 1
Part 2
When I ended the
last story, I was installing the PVC
plastic fittings I use to hold the mast in place.
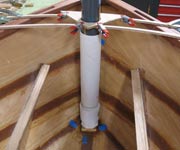
I used a block of hardwood that's shaped to fit the
hull for the mast step. It is then smeared on the
bottom with EZ-Fillet
and set into place. There is a lot of checking for
level and center before that happens, but the directions
to do so are spelled out in the study and building
plans.
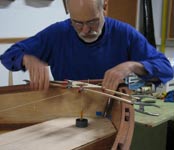
The hardest part of building this hull has been
locating where the hole in the top of the center seat
for the mast support tube went. After some head scratching,
I figured out a way to determine where the center
of the mast would be at rail level. I added some scrap
strips to hold another piece of scrap with the mast's
diameter cut in it. By moving the "holed"
scrap {looked like the part you hold on a ouija board}
around on the scrap strips, I could line the center
of the hole up with the two cords that located where
the mast would go. With that point fixed, I could
shorten up the pencil bob cord that was over the mast
step, and use it to locate the hole in the center
seat.
 |
|
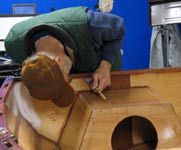
With the hole cut in the top panel of the seat; everything
could now be installed, jump stitched, filleted, and
taped. But first I had to double check that all the
interior surfaces, and edges had been given a good
coating of epoxy to seal the grain. Then it was time
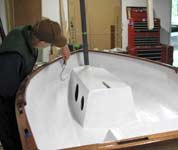
to paint the interior of the hull with three good
coats of marine enamel. Again I had to tent the hull
with a plastic tarp to hold in the heat from a small
electric heater for the paint to cure between coats.
Nothing like cold and damp NW weather to slow down
your progress. The last coat was still damp when I
rolled the hull over to do the bottom.
 |
|
With the bottom up, it was time to fix all the rough
edges on the panel seams. First to clean out any junk
in the gaps, then give the panel edges a good coating
of epoxy to seal them off. Another good place for
using my old toothbrushes. I found a great way to
keep from having to throw them away after using. On
my last trip to Costco, I picked up a double gallon
package of plain white vinegar. I had an old plastic
jar and lid that was deep enough for the toothbrush,
and still be able to screw the cap on the jar again.
After using, I just drop the toothbrush in the jar
of vinegar, put on the cap, and forget it until the
next time I need to use it. I can also put a little
of the vinegar on a cloth, and use it to clean up
epoxy drops (uncured) off the floor and such.
 |
|
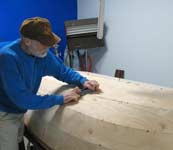
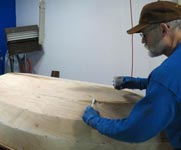
I failed to follow my own instructions when it came
to dressing up the seam edges. I used my new rasp
to dress them up, instead of a sanding block held
flat on the panels surface. The rounded seams looked
good until everything was glassed taped, then the
low spots showed up. Live and learn. With the seams
taped and the selvage along the glass tape removed,
it was time to fair the edges; and the only good way
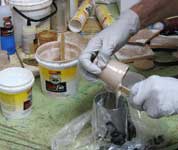
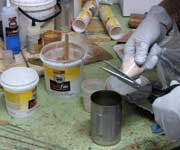
I've found is to "bag" the QuickFair
and squeeze it out in a bead. Since it really is "Quick"Fair,
you want to squeeze out "all" the material
before you fair it in with a 3" putty knife.
With the material in a small bead, the surface area
of the surrounding particles of epoxy and filler don't
kick in so fast, and create more heat, which makes
it cure even faster. I know I am going too slow when
I can feel the bag of QuickFair warming up in my hand.
Thats a signal to hurry along, or toss whats left
if I can't use it quick enough.
 |
|
 |
|
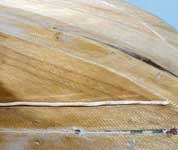
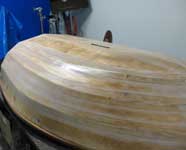
It's time to give the faired tape edges a good sanding
and to check for a smooth transition along the seams.
Look for an "even width" of fairing compound
along the tape edges. This can be hard to see if you
don't have good lighting in your work area. The problem
is trying to figure out where the high spots are and
how much to sand; then where to add more QuickFair
to the low spots. I've produced some truly rough edges
from a combination of low room light and wearing the
wrong glasses. The high spots became higher and the
lows, lower. BUT, I have found a way to help me figure
this out.
I was going to save all my flowing superlatives
about adding pigment
pastes to the weave filling section of
this story. That was the way I had outlined this second
part, until I was re-fairing my daggerboard and saw
the little 2oz jar of black pigment paste. You will
read later my exploits ($%&!*) of adding black
to the pot, said the kettle. My Monty python "oh,
just one more cherry can't hurt" moment. With
a what the hell approach to boat building, I added
just the most minute drop of black to the part A side
of the QuickFair. It turned to a soft licorice as
I stirred it in, and more so after adding the part
B. The revelation, hallelujah brother, came as I spread
it out on the daggerboard. I could tell exactly where
it was and wasn't going. It was no longer a wet or
not wet spot guessing game. This knowledge came after
I had just completed the hull; with all the fix and
fair, fix and faired seams, taped edges faired, weave
filled, and the first coat of paint rolled on. More
live and learn.
Back to where I was in this story before the enlightenment.
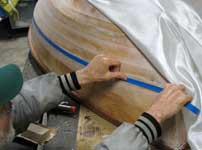
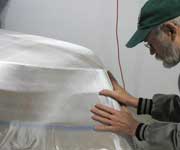
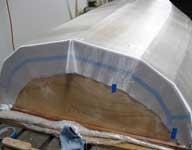
Adding the masking tape that sets the limits of the
bottom glass and laying on and smoothing out the 4oz
glass cloth. I used 50" cloth on this hull and
had to place the "upper limit" tape in the
middle of the glass tape of the upper seam. This led
to fairing problems later, and I would change that
part of the construction if I did it again with 60"
cloth. The cloth would then overlap all the tape and
stop above the upper edge. More live and learn.
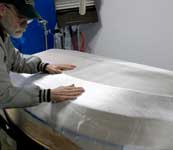
You want to make sure the hull's surface is smooth
and free of any thing that might snag the glass cloth
as you unroll it on the hull and move it about. Try
to square up the weave with the hull, so the fibers
in the longer direction line up with the length of
the hull. This will make it easier to smooth the creases
and folds in the cloth to the ends. Let the cloth
set for two to three days before you wet it out, and
give the cloth a good smoothing several times in between.
You can chase away all the folds and conform the glass
to the hull by doing this, and reduce the seam darts
(cuts in the cloth) to those most difficult places.
On this hull, I could get rid of all seam darts except
for one in the stern. I was surprised that I could
get away with all but one.
 |
|
 |
|
As I had told myself when building the FlyCaster,
I was not going to build another hull without adding
pigment pastes to the epoxy for the weave filling.
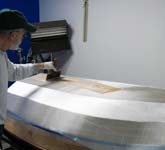
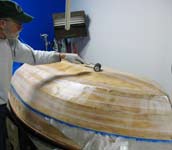
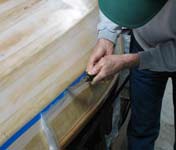
But the "first", wetting out coat of epoxy
has to go on clear; so you can tell when it has a
complete wet out. As you can tell from the photos,
I never put on epoxy anymore without finishing with
a roll out. I cut the 99 cent foam rollers into 3"
sections and use as needed. Every coat gets a roll
out no matter how big or small the job. It keeps from
wasting too much time spent sanding and scraping excess
drips and runs later, to worry about 33 cents worth
of foam roller.
 |
|
 |
|
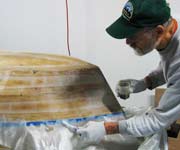
Once the wet out layer has cured, it was time to
play with the pigmented pastes that I got. I wanted
to try for a light gray, so I got the small jars of
2oz of black, and 2oz of white. My first mistake was
to start by adding black to the cup. Hummmm, is that
enough? (Oh yes, more than enough) Maybe a little
more. (No, No too much) Then I added the white and
stirred; then some more white. As you can tell from
the photo, it would have taken a lot of white to counter
the black. Being a cheap (read thrifty) person, I
was not going to waste 3oz of good epoxy because it
was too black. So I started the first coat of weave
filler, and finished with the run stopping roll out.
But the dark coat did show me a "bubble"
in the surface that I had not seen in numerous inspections
of the wetted out glass. It just didn't show up, and
would have caused more hair pulling when I put on
the first coat of paint if I had not used the pigmented
pastes.
The next coat had less black and a lot more white.
I was hoping to cover the first coat with a lighter
coat. The mix came out a medium gray, and was closer
to what I had wanted in the first place. The third
coat, only had straight white in it, and did a pretty
good job of lightening the hull. Between each weave
filling coat, I was able to fix and fair any flaws
that I could find.
One of the products that I would like to see to aid
in final hull preparations, would be a very smooth,
not so quick, fairing compound. Something with a longer
pot life, so you could go over an area a couple of
times with your straight edge and not rip it up with
quick setting partials. Those crusty little partials
that leave those damn little groves, that later need
fixing. With a smoother, slower setting compound,
and the addition of colored pigmented pastes, life
would be great.
After letting the hull set for a couple of days
for a good cure, it was time to break out the marine
enamel. I've had really good results
with the marine enamels from System Three; and the
PUD-g got three coats of Orca white. Now it was a
race between the paint curing (at least a week for
a good hard surface), the weather getting warm enough
so it would, and my desire to start the next new boat
design.
With the full cure on the bottom paint, it was time
to flip it back on it's bottom and install all the
hardware. Getting the stainless backing plate, and
nylok nuts on the "U"bolt inserted in the
bow, let me practice some stretching exercises and
my finger balancing act. Raising it's location to
"above" the center seat came to mind as
I fumbled with the parts.
The five quarter
turn hatches I got from Chuck and Sandra
at Duckworks got a good bead of sealant around their
flanges, and were screwed in place. This was followed
by some head scratching to decide the best place to
attach the hardware for the lower end of the mainsheet
tackle. My rig is currently set up with a mid-boom
system, but I had to temporarily change it to a bridle
system on the transom. I ran a line between holes
I drilled into the two corner blocks, and to this
I added a double pulley traveler block for an end
boom set up. The building plans show several different
ways to do this.
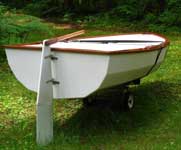
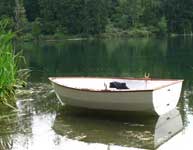
One of the problems with a new boat launching, is
to have enough people on hand to take photos, and
to fill up the boat with it's designated load capacity.
Luckily I have my long time friends, Nick and Eddie
to fill that task. At least for the rowing part. The
odds of having that happen when the wind blows is
in the range of winning the lotto, so those photos
will have to wait.
 |
|
 |

|
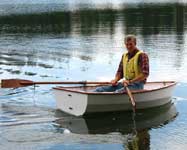
During the "sea trials", I saw that I needed
to raise the "U"bolt in the bow; either
up one panel, or above the seat as I had thought as
I installed the backing plate and nuts. Also the lower
gudgeon needs to be raised about three inches; or
a 3/4" block added and epoxied to the inside,
and the lower bolts replaced with stainless wood screws.
If you are never going to sail the PUD-g, this is
a moot question, but the kids will have a blast. I
can't wait for the first windy day to try out my 36
sq ft Opti sail on this short boat. Have I said that
the boat only weights 65 pounds complete? Using 4mm
plywood, and not installing the sailing add ons, the
hull should get down into the lower 50's. Without
the sailing option I would also construct the center
seat assembly the way I did the stern seat; stitched
and glued, with fillets and tape on the inside and
tape on the outside. With or without any hatches.
I was a little nervous about how the boat would
float, but after rowing it around the lake while waiting
for my friends, my smile only got bigger. After seeing
the hull riding even with two adults, I was happier
still. Nick is 6'2" and Eddie is 5'11",
so that should give you an idea of how much room there
is in the hull. I think the results of my musings
about such a design during my walk down the docks
in Bellingham, Washington last fall, have satisfied
the mission statement I made to myself then; and I
hope you will be too.
I want to thank those of you that have followed
along with all my construction stories, and for this
series on building the PUD-g. I hope that what you
have read about my mistakes and fixes, will lead to
your successes.
I have added a lot more photos since the last installment,
so check out https://www.flickr.com/photos/pud_g
for the latest additions. The sailing photos will
be added when available.
Warren Messer SND
Red Barn Boats
P.S. The next hull down the ways at Red Barn Boats,
will be my Yakima River Flat Nosed Drifter design.
Look for the first story and "flickr photo"
link in Late July or August.
Thanks again
Plans
and study plans for PUD-g available here

Other Articles by Warren Messer
|