18’ compact
double sea kayak
Through the fall and early part of the winter last
year, Fred Gasper, from Haslett, Michigan, and I exchanged
a few emails about a boat project he wanted to undertake.
He was looking to build a double sea kayak so that
he and his wife, Kathy, could enjoy paddling activities
together. Fred indicated that he had already built
several plywood kayaks and was just about finished
with his second stripper canoe, so I knew he would
not need an extensive guide through the basics of
building a larger boat for he and his gal.
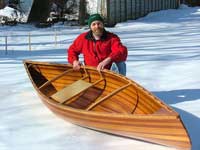 |
Fred with a
solo stripper canoe he built. |
You can see in the accompanying photo that Fred has
pretty well mastered the art of fine woodworking when
it comes to building boats. As a new designer with
several boats of my own out in the world, I was looking
to get connected to another builder who had the talent
and the experience to produce a terrific finished
boat. Clearly, after taking a look at some of Fred’s
prior projects, I was excited to be combining efforts
with his capability.
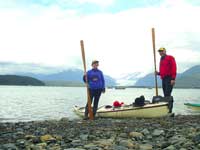
| Fred and Kathy and
another of Fred's boats in Alaska |
|
I developed the Lunada Bay design to fill a niche
in the double touring kayak market. The design brief
addressed such things as being car-toppable, easily
stored in the average garage or basement, able to
carry two adults for day paddling and the odd overnighter,
highly responsive to turning input and able to track
effortlessly. The boat did not need to be able to
carry a week’s worth of gear and food or produce
a high, sustained speed under paddle, as it was to
be a comfortable cruiser for leisure outings.
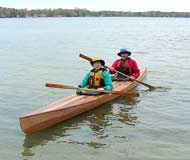 |
Fred and Kathy
on the water in their Lunada Bay |
The result was an asymmetric hull design of 18’
LOA with a beam of 28” to be built in a hybrid
construction method. Hybrid build style is basically
the combination of marine plywood, multichine hull
with a cedar strip built deck. This type of boat takes
advantage of the two build styles to offer quick hull
construction combined with the natural wood beauty
of a stripped deck. It also allows the soft sweeping
contours of a stripper on the part of the boat that
is most often seen by the paddlers.
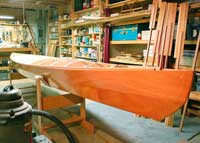
In this style, the builder first assembles the hull
panels, fillets the hull seams and glasses the hull
inside and out. He then inserts a series of building
stations for the stripped deck process and begins
to create the patterns as desired with various colors
and species of wood to suit his taste. The hull, itself,
provides the strongback form for the stations and
soon, the deck is complete and ready to join to the
hull with the bulkheads in place.
| Stations are fitted
into the plywood hull. |
|
The cockpit openings are laid-out on the deck surface
taking care to measure the Center of Buoyancy of the
design to balance the paddling positions in the boat.
Once cut out, the cockpits are finished with the construction
of the rims and flanges for the paddling sprayskirts.
There are probably five recognized methods for cockpit
rim fabrication. All of them work and it more or less
comes down to how you want the whole thing to look.
Something like choosing plaid instead of print for
a shirt pattern.
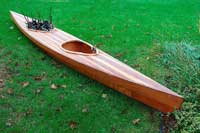 |
Gluing the cockpit
rims |
Just last week, Fred and Kathy took their new boat
out for a spin on the local lake to see how she’d
perform. Fred had been working on the boat, off and
on, since mid February. He managed to squeeze-in a
trip to the Grand Canyon with Kathy, family obligations,
the normal household chores, as well as his regular
job, all at the same time. He was more than ready
to get the boat on the water. The coming change in
the weather probably played an additional role in
the urge to go paddling.
I’m pleased to share with you that the boat
performed like a star, ticking off the big elements
in the design brief while being put through her paces
by Fred and Kathy on an overcast, October day in Michigan.
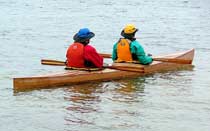
Fred just sent me an email and said, “Tracked
and turned great with no weathercocking. Don't think
she will need a rudder. We named her “Travelin'
Louise”
| Putting "Travelin'
Louise" through her paces. |
|
This kind of report is pure music to a designer’s
ears. I jumped-up from Fred’s email and took
my wife and son out to dinner to celebrate. Everything
was great, except my wife wouldn’t let me eat
the greasy, garlic mushroom burger I really wanted
to order. Seems that even though I can design some
really nice, trim boats, I have a long way to go to
get my own hull form back to my former nice lines.
Fred and Kathy will need to install the backbands,
footbraces,
carry straps, seats, deck accessories and then finish
off Louise with several coats of beautiful, satin
varnish before they put her away for the winter. Fred
indicates that the finished boat will tip the scales
at just over 60 pounds. I’m really looking forward
to the reports from their future adventures in “Louise”
over the coming years.
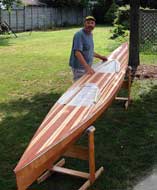 |
Fred will finish
off the deck with several coats of satin varnish. |
As an aside, the name Lunada Bay comes from a local
surf and snorkeling location from my youth along the
beaches of L.A’s South Bay. Where I come from,
Lunada is a Spanish word that loosely translates to
a moon lit party on the beach. I have spent many warm
summer evenings with friends, cooking freshly caught
lobsters and abalone on the beach while a full moon
lit the sea. I couldn’t think of a better way
to use this boat.
Plans are available.
Chris Ostlind
Lunada Design

Articles by Chris Ostlind:
|