A Joansa from Holland
Here is a selection of the pictures I took during the building of my John Welsford designed Joansa. As you will see, there aren't many pictures from the early stages.
That's because there was no digital camera in my home when I started the project.
This Joansa was my first boat building project. I chose this model because it seemed a feasable project for a novice builder, and I liked the long and slender hull shape right away. I also liked the prospect of having a fast rowing boat that could be cartopped. The only experience I had was making tables and cabinets for myself.
(click images to enlarge)
|
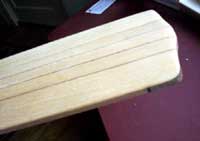
While I was sourcing the right materials for the hull, I started with the oars from European pine and brown Resorcinol glue, to get these beautiful stripes. As you see, I made an hardwood insert (wedge) at the ends of the blades to protect the soft pine.
|
 |
|
|
|
I started building the hull in january 2005. The only place warm enough to work with normal epoxy was in one of the living rooms. In the background, you can see the finished oars. |
|
|
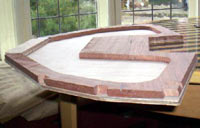
The transom assembly. Note that the notches are cut out under an angle, which is not visible in the drawings. |
 |
|
|
|
The usual plank fitting - still inside, near the wood stove. I used meranti stringers and 6 mm okoume marine plywood (I'd preferred 5 mm sheets, but these were only available in a prohibitive premium quality. |
|
|
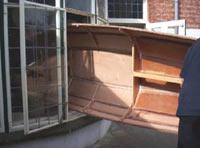
March 2005. The weather is improving earlier than expected, so we're moving the boat to the barn's first floor. After working one week in the barn, temperatures dropped dramatically, and I had to wait six full weeks before I could continue. |
 |
|
|
|
In the barn, the hull work is continued. Here I'm fitting the gunwhales from heavy meranti, since these lengths are only availavle in meranti. |
|
|
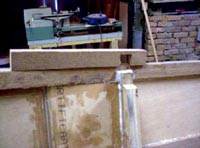
I cut out gaps in the spacers to hide the tops of the bulkheads. I didn't use calculations to find out how I could hide all buklhead tops with regular intervals between the spacers, but I simply layed out a series of dummy spacers to see how things would fit. Trial and error. When I was satisfied, I marked the positions spacers and cut them out. |
 |
|
|
|
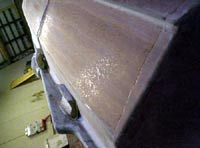
Once turned over, the hull was filled where needed: the lapstrake joints and screw holes (I left the screws that attached the planks to the stringers in). I made this picture to consult a local boat building professional about the size of the fillets. |
|
|
This picture was also made to consult my boat building pro about how smooth the hull had to be before glassing it. |
 |
|
|
|
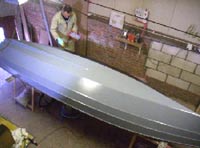
Then came Stefaan from the Belgium based company tawhiriboats.com to help me with the glassing of the entire hull exterior to shield the boat against abrasion. It took us one morning. |
|
|
Three layers of coating were applied, with alternating colors, so I could see in which layer I was sanding afterwards. These layers added more weight that I had expected. This Joansa is becoming heavy. |
 |
|
|
|
After painting another three layers, this is the finished Joansa, over 60 kilos of boat, including the silicon bronze oarlocks. |
|
|
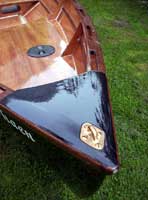
Some details. Here is the pirate-look bow with bronze eyelet. |
 |
|
|
|
The mounting point of the oarlock, also bronze. |
|
|
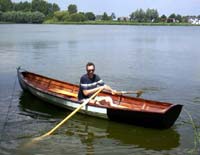
July 22. After six months of work in my spare time, we can launch De gebraeden haen on a nearby lake. |
 |
|
Since the launch, we've rowed hundreds of kilometres. We generally row with two, holding two oars each (sculling), and we take our dog and lots of picknick gear with us. When rowed with two and carrying so much, the boat tends to keep turning once it starts to, because the bow is trimmed too much bow-down. The extra weight seems to affect the "center of lateral resistance", according to the designer. He says that the Joansa is basically a one rower boat and suggests that the course stability, as I call it, might be improved by extending the skeg to where it meets the transom. That may be something to consider for future Joansa builders.
|

