Fitting Leather Partners
Mitch and 1 were doing a bit of finishing work to Truant, putting the fittings on and rigging her was only a matter of an hour or so but she was to go into the water in a few days and lacked some of those little finishing touches which would make her look nice on launching day. Little touches can make a big difference to a new boat for the big event and while we were leathering the spars, making the parrels for the balanced lugsail and fitting the cleats and fittings to control the rig it was no trouble to add a few extra items.

Finishing Truant
1 decided to leather the mast partners, that is the reinforced hole in the foredeck where the mast goes through. There is about an inch of timber here, and to ease the point loading on the alloy spar a leather padding is a good idea. This series of photos shows how I did the job.
First of all 1 used the trimmed off piece of leftover tube from the mast to outline the hole in the deck, then allowed another 1/8 in radius for the thickness of the leather plus a little working clearance and carefully cut it out with a jigsaw ( sabre saw ). I then sanded the inside of the hole smooth, and after rounding the top and bottom edges over painted the inside with two coats of epoxy resin.
Next job was to give it two painted coats of resin, the first one thinned with acetone for penetration and the second one sanded smooth and coated with wood primer.
Having prepared the mast hole ( partners) its just a matter of following the steps below, simple but it looks really nice.
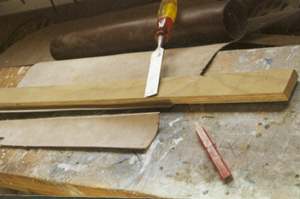
#1 First I cut a strip of rough chrome leather 3 in wide and plenty long enough to go around the mast with some to spare. Nothing fancy in the way of tools, just a very sharp chisel and a straightish piece of wood.
The leather is usually available from craft shops but needs to be thick for the cushioning effect. Get some leather dressing while you are there, this is to be applied after the leather is glued in place and finished.
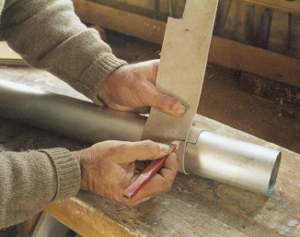
#2 Next I wrapped the leather around the mast section and marked the leather where it overlapped and cut it to length. Cut it exactly to fit, the hole in the deck will be a fraction larger and there will be a working clearance when you fit the leathering.
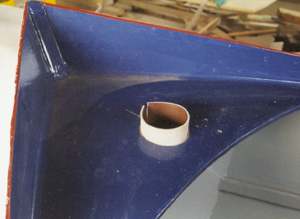
#3 The leather was then set into the hole to check for length, it needs to stick out below the lower edge of the hole by about half an inch or so and have perhaps 1/16in clearance between the ends.
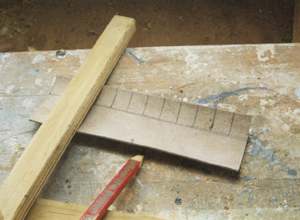
#4 This 3 and a little bit inches diameter hole looked about right divided into 12 around its circumference so here it is marked out with 3/4 in deep "petals'. Try for “petals” that are about square in dimensions.
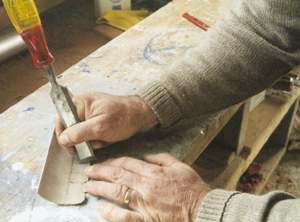
#5 Again, back into action with the chisel and the leather is cut to shape. Keep your cuts square to the surface.
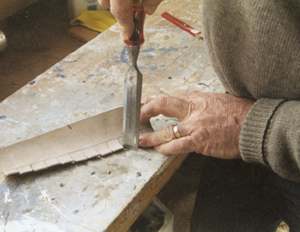
#6 Trimming the petals corners off to make them look tidy. ! don’t normally have my hands positioned like this, only when I want the camera to be able to see. Mind your fingers and keep yourself safe when working with sharp things, it is not only power tools that bite.
Do dress the edges when the cutting is finished.
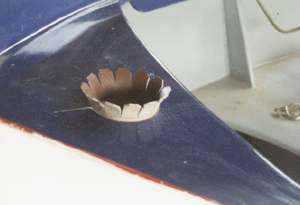
#7 Once again checking the fit, note that the join in the leathering is at the front where the load will be least.
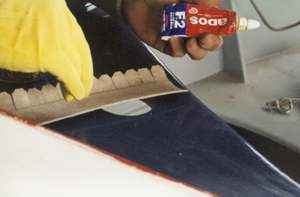
#8 Ready to apply the contact glue, note the rubber glove to keep it off my skin. This is Ados F2, a spirit based contact cement that is sold for handyman use. Good stuff for this sort of work.
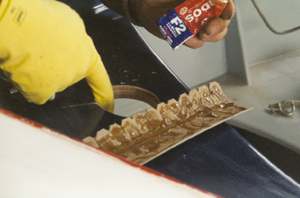
#9 Spread on the leather first and then smear it onto the inside of the partners. Leave it for a few minutes to go tacky. ( apply as per the manufacturers instructions and don’t breath the vapours)
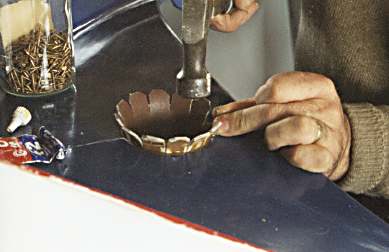
#10 Here I am tacking it into place with 3/4in x 16 g ringed boatnails, one per “petal”. Copper tacks are the traditional things but I had none in the workshop right then and the barbed boatnails hold better.
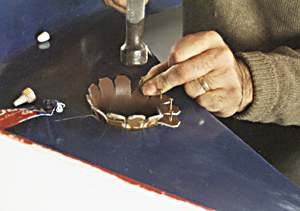
#11 Starting the nailing, note that I have started opposite the join in the leather and am getting several started before setting them down hard. Put them down flat with the hammer, but don’t punch them in.
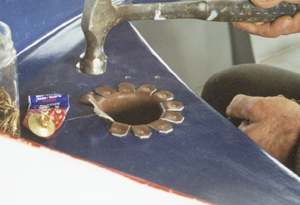
#12 Only two nails to go, working evenly from the center back around the sides toward the join. I am applying a little extra glue under the petals as I go.
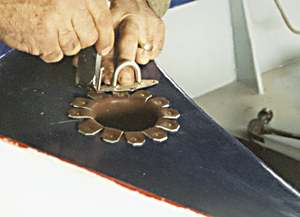
#13 With the leathering finished I am trimming it a little to fit the deck eye for the boom down haul. Doesn't it look nice!

#14 Do spend a little time finishing your boat, the small things can often make a big difference in how she looks.

#15 Up on the grass at the 2004 Rotoiti Small Craft Rally, although very simply finished with brushed enamel paint and only a touch of varnish this boat was much admired and its little touches like the leathering that makes the difference.
John Welsford.
Designer, Truant.

