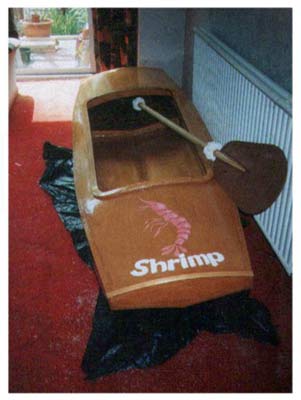
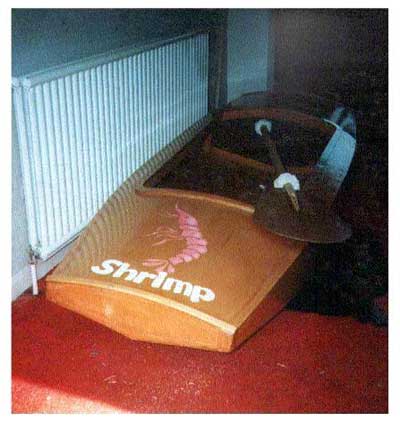
Shrimp
by Les
Brown
I have always loved small boats
and simply being on the water. I am with the ‘ Wind in
the Willows ‘ rat all the way on that one. I am a pensioner,
getting on a bit and my family has gone in all directions now
so I want to make these days as ‘ boaty ‘ as they
can be.
I live in England a little less
than half a mile from a waterway called the Stratford Upon Avon
Canal so called because it winds its way from the city of Birmingham
along its twenty five mile course to Stratford, home of the
Bard, where it joins the River Avon. Solihull, the town where
I live, is on the Stratford Upon Avon Canal about seven miles
out of Birmingham, eighteen miles short of Stratford.

Fine, my problem was I had no
personal transport and while the half mile to the canal bank
was a pleasant stroll – not with a boat on my shoulder
it was not. I needed a boat that was small, light and could
be pulled along by an old guy on some kind of micro-trailer
that would come apart like a piece of James Bond equipment and
stow inside the boat when I reached the water. It was love at
first sight when I saw pictures of the ‘ Mouse ‘.
It was small, it was light, it was cute but although I still
had no idea how the trolley would work I was surely going to
need the space under those sealed decks to stow it. I decided
to round the decks too. Not knowing the diameter of the wheels
I would choose an extra two or three inches below decks could
make all the difference. I also intend to fit ‘Shrimp’
out with pedal power eventually and side decks seemed a good
idea to prevent me accidentally treading on the control rods
that will run from the seating area back through the transom.
So, with one thing and another, ‘Shrimp’s’
deck seems to have designed itself.

I already had two sheets of plywood
that were gathering dust at home but I also bought a half sheet
of 12mm ply for the bulkheads and transoms because I intended
to remove the centre of the bulkheads for under-deck access
and the extra thickness would make them more substantial. I
reasoned that as no extra framing was needed and with the middles
gone the weight difference would be negligible. I plotted the
larger of the two bulkheads onto the 12mm ply exactly as the
plan, marked the centre point along the top and made a new dot
three inches above it. I bent a piece of whippy beading from
one of the top corners, through the new dot, down to the opposite
corner and then drew in the resulting curve. After cutting the
bulkhead with its new shape I measured 11/2” in from the
outer edge, all round, and cut the middle out. I now positioned
the large bulkhead on top of the other marked out bulkhead and
transoms and drew the same curve on them. Although the curves
were different sizes they were all arcs of the same circle.
A gut feeling told me that was the way to do it. I have no idea
whether that was the correct thing to do but it worked fine.
I had already glued a 3/8”
x 5/8” gunnel strip along the top inside edge of the side
panels to glue and tack the deck edges to when I bent them down.
The strip stopped ½” short of each end so the transoms
would fit between the sides but the bulkheads had to have notches
cut out of their top corners to house the strips.

Should anyone decide to try a
curved deck do not use ply thicker than 4mm and if 3mm is available
so much the better. If you decide to use 6mm ply or thicker
it will fight you. If you are also going for side decks keep
things simple by decking the ends first and cutting the side
decks in separately afterwards. You will need deck support strips
for this to carry the inner edges of the side decks. I used
two lengths 5/8” wide and 11/2” deep. I measured
4” in from the gunnels along the top of each bulkhead
on both sides and made marks for siting the support strips.
I cut them to fit snuggly between the bulkheads, glued the ends
and put screws through from the other side. Be sure to mount
them proud of the bulkhead top because when the glue is dry
you will need to plane a bevel on the top edges of the deck
support strips to accurately slope the side decks down to the
gunnels. This is very easy if you have an electric plane. When
tacking the glued side deck edges along the supports it will
help if you get a trusting friend to hold a big rock under them
while you hammer the tacks in. When the side decks are on and
butted up to the end decks you will see a slight difference
in shape between the end deck, which is curved, and the side
deck, which is flat. The difference can be wiped away with a
sander and if the deck is painted the join will be invisible.
When the gunnels have been planed and sanded to your satisfaction
epoxy a strip of fiberglass tape all round the gunnel and transom
edges.
You could make life still
easier by simply curving the end decks and leaving the side
decks off altogether. In that case you will need an outer gunnel
strip as specified for the standard Mouse.


