Spiling the Whiskey Plank
By Shawn
Payment
The 13th annual San Diego Wooden
Boat Festival was held June 14-15, 2003 at the Koehler Kraft boatyard.
(See: www.woodenyacht.com)
The event featured a variety of classic wooden boats and offered
seminars on a variety of boat repair and maintenance techniques.
(Click HERE
for Shawn's article about the show)
For me, the highlight of the weekend
occurred late Saturday afternoon when they held a "Whiskey
Plank" ceremony. The "Whiskey Plank" is the final
plank required to complete the outer shell of a wooden hull. This
is considered to be a major milestone in the construction of a
wooden yacht.

Fellow boat builder Joe Millard
and I pester a
shipwright with questions before the ceremony
Tradition dictates that two things
occur once the Whiskey Plank is attached. First, the owner of
the newly constructed hull is obligated to buy whiskey for a toast
to the shipwrights who constructed the hull and second, a substantial
"progress payment" becomes due.
On this occasion, we were celebrating
the hull completion of Pacific Class #16. Pacific Class yachts
were first designed and built in San Diego at the Kettenburg Boat
Works in the late 1920's. (www.kettenburgboats.com)
Over the next 30 years, a total of 83 Pacific Class yachts or
"PC's" were built. These boats proved to be fast and
able one-design racers which were ideally suited to San Diego
conditions.

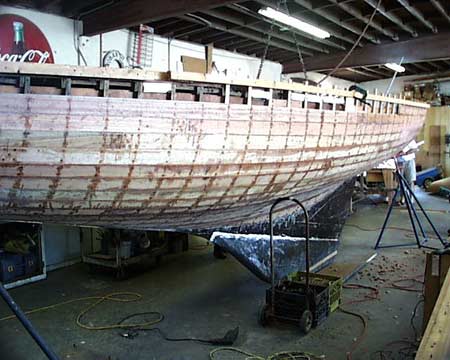
PC hull #16 awaits her last, a.k.a.
"Whiskey", plank
In the last decade, Koehler Kraft
has restored several of these classic wood hulls with modern epoxy
encapsulation methods of reconstruction. Hulls that would otherwise
be destined for the scrap heap are not only being saved but also
returned to active sailing service. By the day of the festival,
PC #16 had already been almost completely re-planked in ¾"
Philippine mahogany (except for the whiskey plank, of course).
"Before" pictures playing on a nearby television monitor
showed that she had previously been in pretty sorry shape.
Before the Whiskey Plank could
be attached however, it needed to be "spiled". "Spiling"
is the art of determining the precise shape that a plank needs
to be to fit into a particular space. This has always been one
of those magical bits of the boat building art that has completely
escaped me. I have read dozens of descriptions of how to "spile"
a plank, but I never truly understood the process until I watched
the process in action.

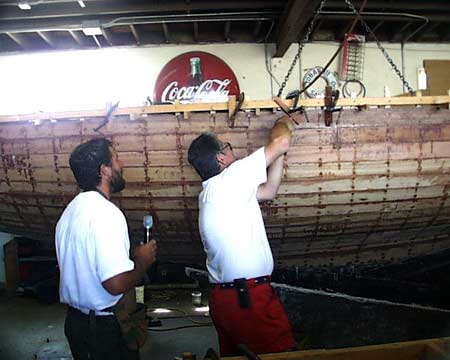
Shipwrights gather to spile the
whiskey plank
The shipwrights began with a pile
of thin plywood door skin strips about 2" wide and 3-4 feet
long. They had screwed these flimsy strips to the frames all along
the length of the hole where the "Whiskey Plank" was
destined to go. Each strip overlapped another by a few inches
to create one, long, continuous strip of wood.

Creating a pattern with plywood
strips, tabs and hot glue
At this point in the process, I'm
pretty puzzled. It was obvious that this mish-mash of hastily
assembled plywood bits were not even close to the shape of the
required plank. However, a few moments later, it would all become
clear. But first, a shipwright appeared with a hot glue gun.
"Hot glue?" I thought,
"You can't build a boat with hot glue!"
Working swiftly, he glued together
all of the overlapping strips of plywood. Then he pulled out a
handful of thin plywood tabs, each about 1" x 3". These
he began gluing to the central strip every 6" or so-first
butting up against the top edge of the hole and the next butting
up against the bottom. It was quickly apparent that the central
strip was the "backbone" of the pattern and each little
tab was a "rib" defining the top and bottom limits of
the plank.
Minutes later, the hot glue had
set, the screws holding the completed pattern to the frame were
removed and the entire assembly was flopped onto of a new plank
of Philippine mahogany. I immediately realized that all that was
needed to produce a correctly sized plank was to "connect
the dots" between all the tabs.
"This is the most important
thing you need to plank a hull," said a shipwright while
showing us a long, narrow 1"x 3" mahogany plank. "A
batten that bends fair."
The mahogany batten was screwed
onto the soon-to-be whiskey plank in line with each of the tabs
on the top side of the pattern. A circular saw was run along the
batten and just like that, the top edge of the plank was cut.
The batten was then shifted to the bottom edge of the plank and
with a second pass of the saw, we our Whiskey Plank was ready
for a test fit.

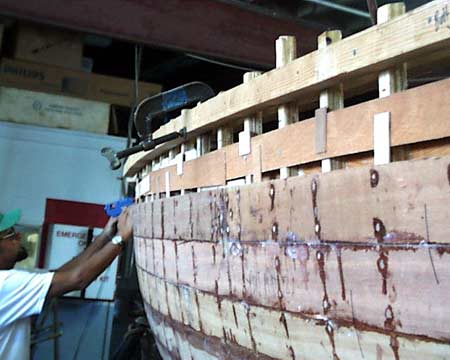
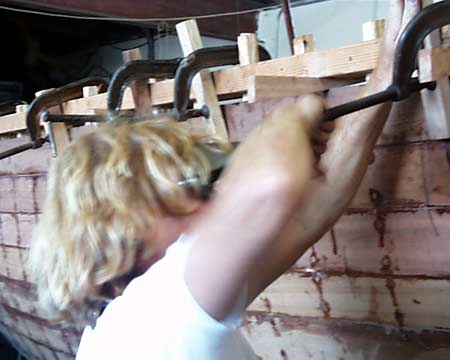
The cut plank is clamped for a
test fit
It slipped into place like a puzzle
piece. Only a few tiny gaps existed between the Whiskey Plank
and the plank below. This was due to the curvature of the hull
and would be corrected by beveling the plank. "Beveling"
refers to shaving a plank's edges to ensure a tight fit against
it's neighbors. Since the plank was near the shear, very little
beveling was required. The shipwrights simply made a quick mental
note of where the gaps occurred, took down the plank and used
wood plane to quickly make the necessary adjustments.
The moment had come to affix the
plank to the hull. Using the a process and materials familiar
to anyone who builds stitch and glue boats, the shipwrights coated
the whiskey plank, frames and neighboring edges with epoxy resin.
Then they mixed up a large batch of epoxy thickened with cotton
fibers and troweled it onto the adjacent plank edge and frames.
The Whiskey Plank was clamped into place and then screwed to the
frames with screws covered by mahogany plugs. Excess epoxy squeezed
from the joints was quickly scraped and toweled away.

Epoxy is applied and the Whiskey
Plank is clamped into place

The Whiskey Plank is finally screwed
to the frames
At long last and with great ceremony,
owner Rish Pavelec was called upon to install the very last screw
and plug. With a hearty cheer, the whiskey was served and all
were invited to raise a glass in honor of the newly planked hull!

Owner Rish Pavelec installs the
last screw

A demonstration
of the planing process still to come

Koehler
demonstrates use of an adze to fair the hull
Although there is still much to
do before PC #16, can return to the sea, there was a fine example
of what the finished product will be. Koehler Kraft had recently
completed a restoration of "Wings", PC #8, which was
originally launched in 1931. This gorgeous little sloop looked
better than the day she was born. By the time PC #16 is completed,
it should look every bit as good.

"Wings" - Pacific Class
(PC) hull #8, recently
restored, PC #9 in the background
In retrospect, it seems odd that
the "highlight" of the an entire wooden boat festival
would be the installation of a single plank on a 70-year-old hull.
But as you can tell, I learned a great deal about the boat building
process and the traditions associated with it from this one simple
event. Who could ask for more? |

