|
Problem Solved
by Greg Pullen
One of the worst situations for
a boating family is to have a family member who doesn’t
want to go near the water. Or who doesn’t take any interest
in sailing, building, watching, eating, sleeping and breathing
boats – which we all realize is quite normal behaviour once
you have the boating bug.
So it was with great delight that
I saw my daughter Lucy begin to take an interest in canoe-ing.
To overcome her usual state of well-choreographed boredom when
watching me fiddle with “yet another boat”, she asked
if she might borrow my friend’s canoe to paddle on the farm
dam.
It was a hot summer’s day,
so with a warning about snakes and the wearing of a PFD, she and
her brother spent a very pleasant couple of hours in (& out)
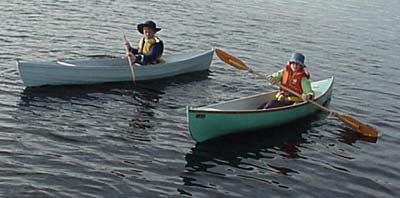
of a lightweight, clinker-built Wee Lassie design. I noticed,
as I occasionally checked on her well-being, that she was handling
the canoe very well for a beginner, and was having a ball.
The day ended with a very soggy
but very happy girl.

A couple of weeks later we launched
a newly-built Peapod (see Duckworks archive “A
Matter of O’pinion”) and Lucy again spent
hours paddling confidently on the Huon River in the borrowed canoe.
She was discovering the joy of “messing about in boats”
and in her usual straight-forward manner she suggested a similar
canoe might be a suitable present for her up-and-coming ninth
birthday.

Having just completed one strip
plank project using ‘Huonville Pine ’(CCA treated
Radiata ) my mate Bob and I began to contemplate the building
of Rushton’s Wee Lassie design in a similar way. Out came
Bob’s well-thumbed copy of “The Life & Times of
Henry J. Rushton”, and it wasn’t very long before
we began to talk earnestly about the project.
Bob converted feet, inches and
weird fractions into simple metric measurements, then drew up
the half breadths. I ran 120 metres of our 35x12 treated pine
strips through a thicknesser, reducing them to 6mm. These were
ripped in half on a table saw into 16mm wide laths. We cut the
seven moulds from 12mm MDF fibre-board, spacing them about 405
mm apart as specified in Rushton’s original plan. One great
thing about building a symmetrical double ender is that the moulds
either side of the centre are duplicates, making it a quick process.
And if you make a mistake, at least it’s going to be the
same at both ends of the boat!!
We fixed the moulds bottom-up to
two 90x35 beams, mounted on saw horses for a good working height.
The whole jig was levelled and plumbed. A 35x12 keelson with 6
mm of rocker from centre to stem was let in flush to the moulds
to stiffen the works. Two stems were laminated from three pieces
of 4 mm Celery Top pine. These were fixed at either end of the
jig and with an epoxied half-lap joint to the keelson about half-way
between moulds 1 & 2.

The process of strip planking is
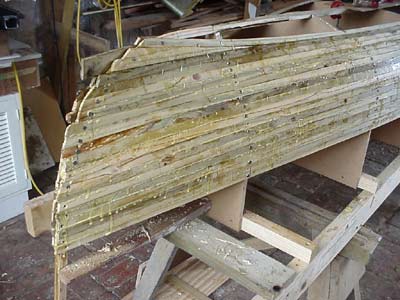
a very straightforward affair. The strips were edge-glued using
Purbond, and temporarily pinned to the moulds with chipboard screws.
We noted that the 16x6 mm pieces lay very neatly together, which
became evident when we began to sand the hull and found the inside
required very little work to acquire a smooth finish.
Because the strips were only 6mm
thick, a hand stapler became a very useful tool for keeping the
edges pulled tight together, almost eliminating the need for clamps.
We kept a container of vinegar close by, and dipped the stapler
into it after each run to prevent it being gummed up by the glue.
It’s a good hand cleaner too – and very cheap !
Pulling the 1000 metal staples
out wasn’t much fun, but was accomplished easily with a
sharpened hooked tool and a pair of bullnose pliers. Any damage
done at this stage would be repaired later when the hull was faired
with epoxy before glassing. This rough-and-ready procedure would
be little use if clear-finishing the boat, but as I prefer a painted,
work-boat finish, staples are a very practical method of holding
it in place while the glue dries.

(I have been searching unsuccessfully
for plastic staples, which I believe exist for use in situations
as described above. I’m sure they will be an even greater
asset for strip planking).
A couple of stretcher pieces had
to be added as we worked towards the waterline at either end as
the bend in the strips was becoming very banana-shaped and complicated
by a very tight twist between the first mould and the stem, producing
a delightful “kiss” in the bow. (see photo above)

The hull was then sanded, filled
and faired on the outside, taken off the building frame and given
similar treatment inside, then returned to the moulds while the
outside was glassed with 4oz. cloth. Although glassing the hull
both outside and in adds some weight to the canoe, it makes a
very stiff boat which can be bumped down rapids, or run up onto
a rocky shore without fear of anything other than cosmetic damage
– a very important factor when building for adventurous
kids (of all ages!).
Celery Top pine sheer strakes were
added both inside and out, further stiffening the boat, and a
small 15 x 10mm skeg was fixed along the centreline underneath
for directional stability plus added strength for heavy-footed
entries to the canoe.

As I wanted the thing to be unsinkable,
a buoyancy chamber was added at each end, with the aft compartment
brought forward about 800mm to the site of the second mould. A
slight camber was worked into the ‘deck’ to compliment
the sheer, and a plastic screw-in inspection port made this a
very dry area for storing food & drink, rainjacket, light
line & anchor, dolls, etc. I found a couple of aluminium cupboard
door handles, fixing these to each end to make it easy for kids
to carry the canoe, and for tie-downs when transporting. A keel
band of aluminium “D” section was run from stem to
stern to complete the work.
Due to interruptions from the real
world, the canoe was not finished in time for the birthday deadline,
but some pink bunting and a hastily-scrawled birthday greeting
on a piece of scrap plywood made a very impressive present for
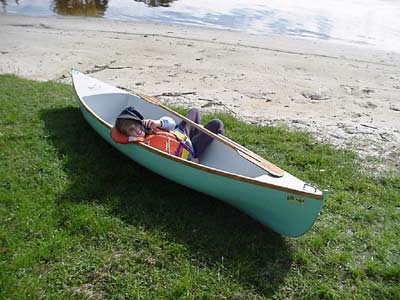
a very happy girl. Hence the name “Gift Rapt”.

Launching was delayed by another
couple of weeks due to a bad paint job, which had to be totally
removed and re-done. I’m still not sure what caused the
top coat to remain soft, but all except my temper was improved
with the successful application of the second lot of paint.
A ceremonial launching was held
– a necessity for vessels of any size – and Lucy and
friends of all ages and sizes have enjoyed the canoe ever since.

Seating is a basic foam cushion,
with a webbing strap stretched between the gunwales for back support.
A lighter paddle will replace the original, which was built to
my usual ice-breaker specifications, but is much too heavy and
powerful for the needs of a nine-year old girl.
Gift Rapt weighs in at 16 kg (35
lbs) – Rushton aimed for about 22 lb in his Wee Lassie plans.
However, it makes easy passage through the water, and more importantly,
ensures peace-of-mind for parents knowing that the kids are safe
in an almost indestructible and unsinkable canoe.
And above all, we now have a 100%
aquatically-adjusted family.

Problem solved. I’m rapt
!
(Please note that our “Huonville
Pine” is CCA-treated Radiata pine, and that the copper/chrome/arsenic
preservative means care must be taken to avoid breathing in dust
when sawing and sanding.)
PIX : WL STRIPS, BOW DETAIL,
FINISHED, KISS, GIFTWRAPPED, RELAXING, RAPT ON RIVER, WEE LASSIES,
LUCY UNDERWAY
|

