Building Frolic2
By Jeff Blunck jeff@goldencoast.com
| Three years ago I decided to fulfill one the goals in my
life of building my own boat. I'd had this idea for over twenty years of wanting to take
vacations lake sailing in the USA. Like most of us, the years go on and the children get
older until one day you realize that the dream had never gone a way and it was time to
make it happen.
I researched fairly hard looking for "just the
right design. I had the skills and the tools but wanted something that could be realized
fast enough to keep my interest from fading. I settled on the following criteria:
- Light weight for towing ease. (1200 lbs. or less with trailer)
- Beachable, therefore shallow draft.
- Plywood hard chine construction for faster building.
- Big enough for at least 4 people to day sail.
- Enough storage for camp cruising.
- Some rough wave capabilities for the larger mid-western lakes.
During my research I found the Jim Michalak web site and
I ordered his design catalogs. His web site was very informative about how boats should
work and his simplicity of design was encouraging. One of the designs in his prototype
catalog caught my attention. It was the Frolic2. It was a bit longer at 20 feet than I
wanted but at only 5 feet in width with shallow draft and a small walk through cabin for
camping, I was looking at my idea of a boat.
It was a prototype design and the plans where only
$20.00. I had already spent several hundred dollars on boat plans looking for the right
one, so this was a good deal. (What homebuilder doesn’t have a library of plans to
brag about?). Two weeks later, I had my plans and I knew right away it was the design that
I wanted to build. It fit all my criteria and was a nice looking design as well.
The only design change I made was in the plywood
thickness. I found a great buy on 3/8" plywood so went 3/8" for everything
rather than ¼" on the sides and ½" on the bottom. Since I was going to
fiberglass the bottom inside and out for abrasion protection, the strength would be
comparable. Mr. Michalak approved of the idea and in use it has proven very strong but
I’m sure it added 100 pounds to the project.
I built two sturdy saw horses, ordered the epoxy and
fiberglass from RAKA, and collected the required tools. I did purchase a sheet rock square
which is 4’ long to aid in the layout measuring and after using it, I would recommend
it to anyone building a plywood boat such as the Frolic2. |
| The following photos are a short trip through the
building process. |
| After using butt joints to joint the plywood to length and
cutting the patterns, I used plastic wire ties to "zip" tie the boat together.
This actually worked very well and though it took two and three per hole in places of
high-pressure at the bow, it was very fast. After getting the boat straight and in
alignment, I mixed together a paste of epoxy and wood flour to fill the seams between the
plastic ties to "tack" the boat together. After this set over night, I removed
the ties and continued filling in the gaps where the ties where removed. (Hint: Use tape
on the inside of the joint to keep excess epoxy from squeezing through and creating a
mess. ) |
| Here it is with just the outside seams with tape and epoxy
applied. It was turned over to finish the seams on the inside. At this point the hull
weighs in at about 300 lbs. and is easily turned with a couple of helpers. Note the motor
well cut out at the stern. I was starting to get the idea at this point that this was
going to be a good sized boat, bigger than I had originally envisioned. The boat was
turned back over to finish glassing and painting the bottom. I used Behr exterior latex as
the finish coat. It seems to be very durable and not affected by water though the longest
I’ve had her in the water is 5 days. It’s very dry here in eastern Colorado so
everything dries out well when setting on the trailer. Now
it was time to find a trailer, and that turned out to be a hard thing to find for a 20
foot boat so I decided to build my own. (See earlier article.) I left the wheels off the
trailer to reduce the height while I finished the boat. |
| You can see the motor well and walk through cabin as well as
the sharp entry bow shape. At this point the hull is complete with the bottom finished and
painted. Next is finishing the topsides and making the rudder, leeboard, mast, and motor
board. Plenty to do yet. |
| All most done! Have to paint the inside and build the mast and
sail. Oh yeah, have to put the fenders on the trailer too! |
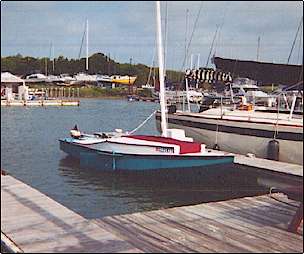
| Finally ready for launching. Here she is at Lake McConaughy in
western Nebraska. I had a friend who wanted to donate something to project. Being a
welder, he built the aluminum rudder and did a great job. Note the motor mount plate,
which keeps the mounting screws on the 3 HP Tonaka from digging into the motor board. The
rudder is offset to keep the motor thrust centered. It works well enough though I’m
not sure it was necessary as the small skeg and a center mounted rudder would be enough to
prevent any handling problems under power. |
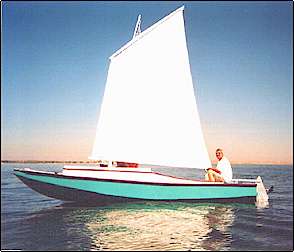
| Launched with champagne and under sail for the first time on
September 25, 1999 after 5 months of work totaling about 160 hours including the trailer.
Cost for the boat only including the poly sail is around $900.00 complete. With the
trailer, Tonaka motor, and licensing I have just less than $2000.00 in the project and am
very pleased with the results. |

|
Being unballasted with a narrow
beam you do have to keep track of what you are doing when the wind kicks up. I’ve had
her out double reefed in 25+ Mph of wind and 2 & 3 foot waves at a Lake Texoma
messabout and she took care of her crew. I would prefer not to do it again but it’s
nice to know the boat is capable. |
| The project was very satisfying and the design is
all that I wanted in a boat. Hats off to Jim Michalak and his quick responses to my
questions and for a good design with detailed plans. I hope to see
other builders at messabouts across the USA. After all, it’s what I always wanted to
do!
Jeff Blunck
Jeff@goldencoast.com |
 |

|